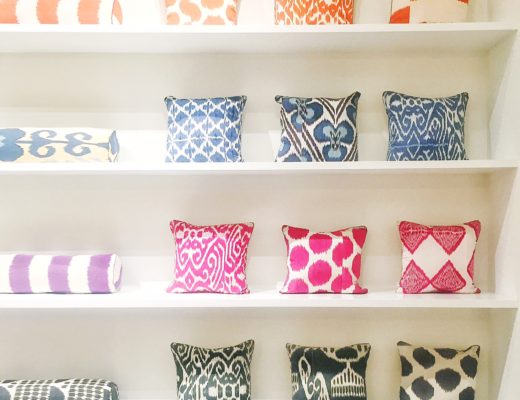
Summer is not over and I am wanting to Indigo back to summer camp when days were full of freedom and crafting. If you’re dreaming like me, this DIY will bring you right back into that summer creative swing.
Shibori is having its moment in the sun and it’s a blast from the past. Think: classy and elegant tie-dye.
This step-by-step process will reveal stunning one-of-a-kind pillowcases, cloth napkins, or sundresses that will help you keep that summertime swagger.
What is Shibori?
Shibori is the Japanese dyeing technique dating back to the 8th century that focuses on using indigo. Shibori involves binding, folding, twisting and bunching cloth then dyeing the cloth in indigo.
I’ll share a few of my favorite resist-dyeing techniques, all of which create unique and as vibrant as you want works of art.
Get outfitted:
Indigo Kit – this includes most of what you will need to make the dye.
2 clean buckets and lids – one for water and one for the dye
For binding; clips (of all sorts), wood, string, rubber bands and PVC pipe. I just looked around the house for what I could find, no need to run to the store!
Dinner Napkins – or simple cotton fabric for your own creation!
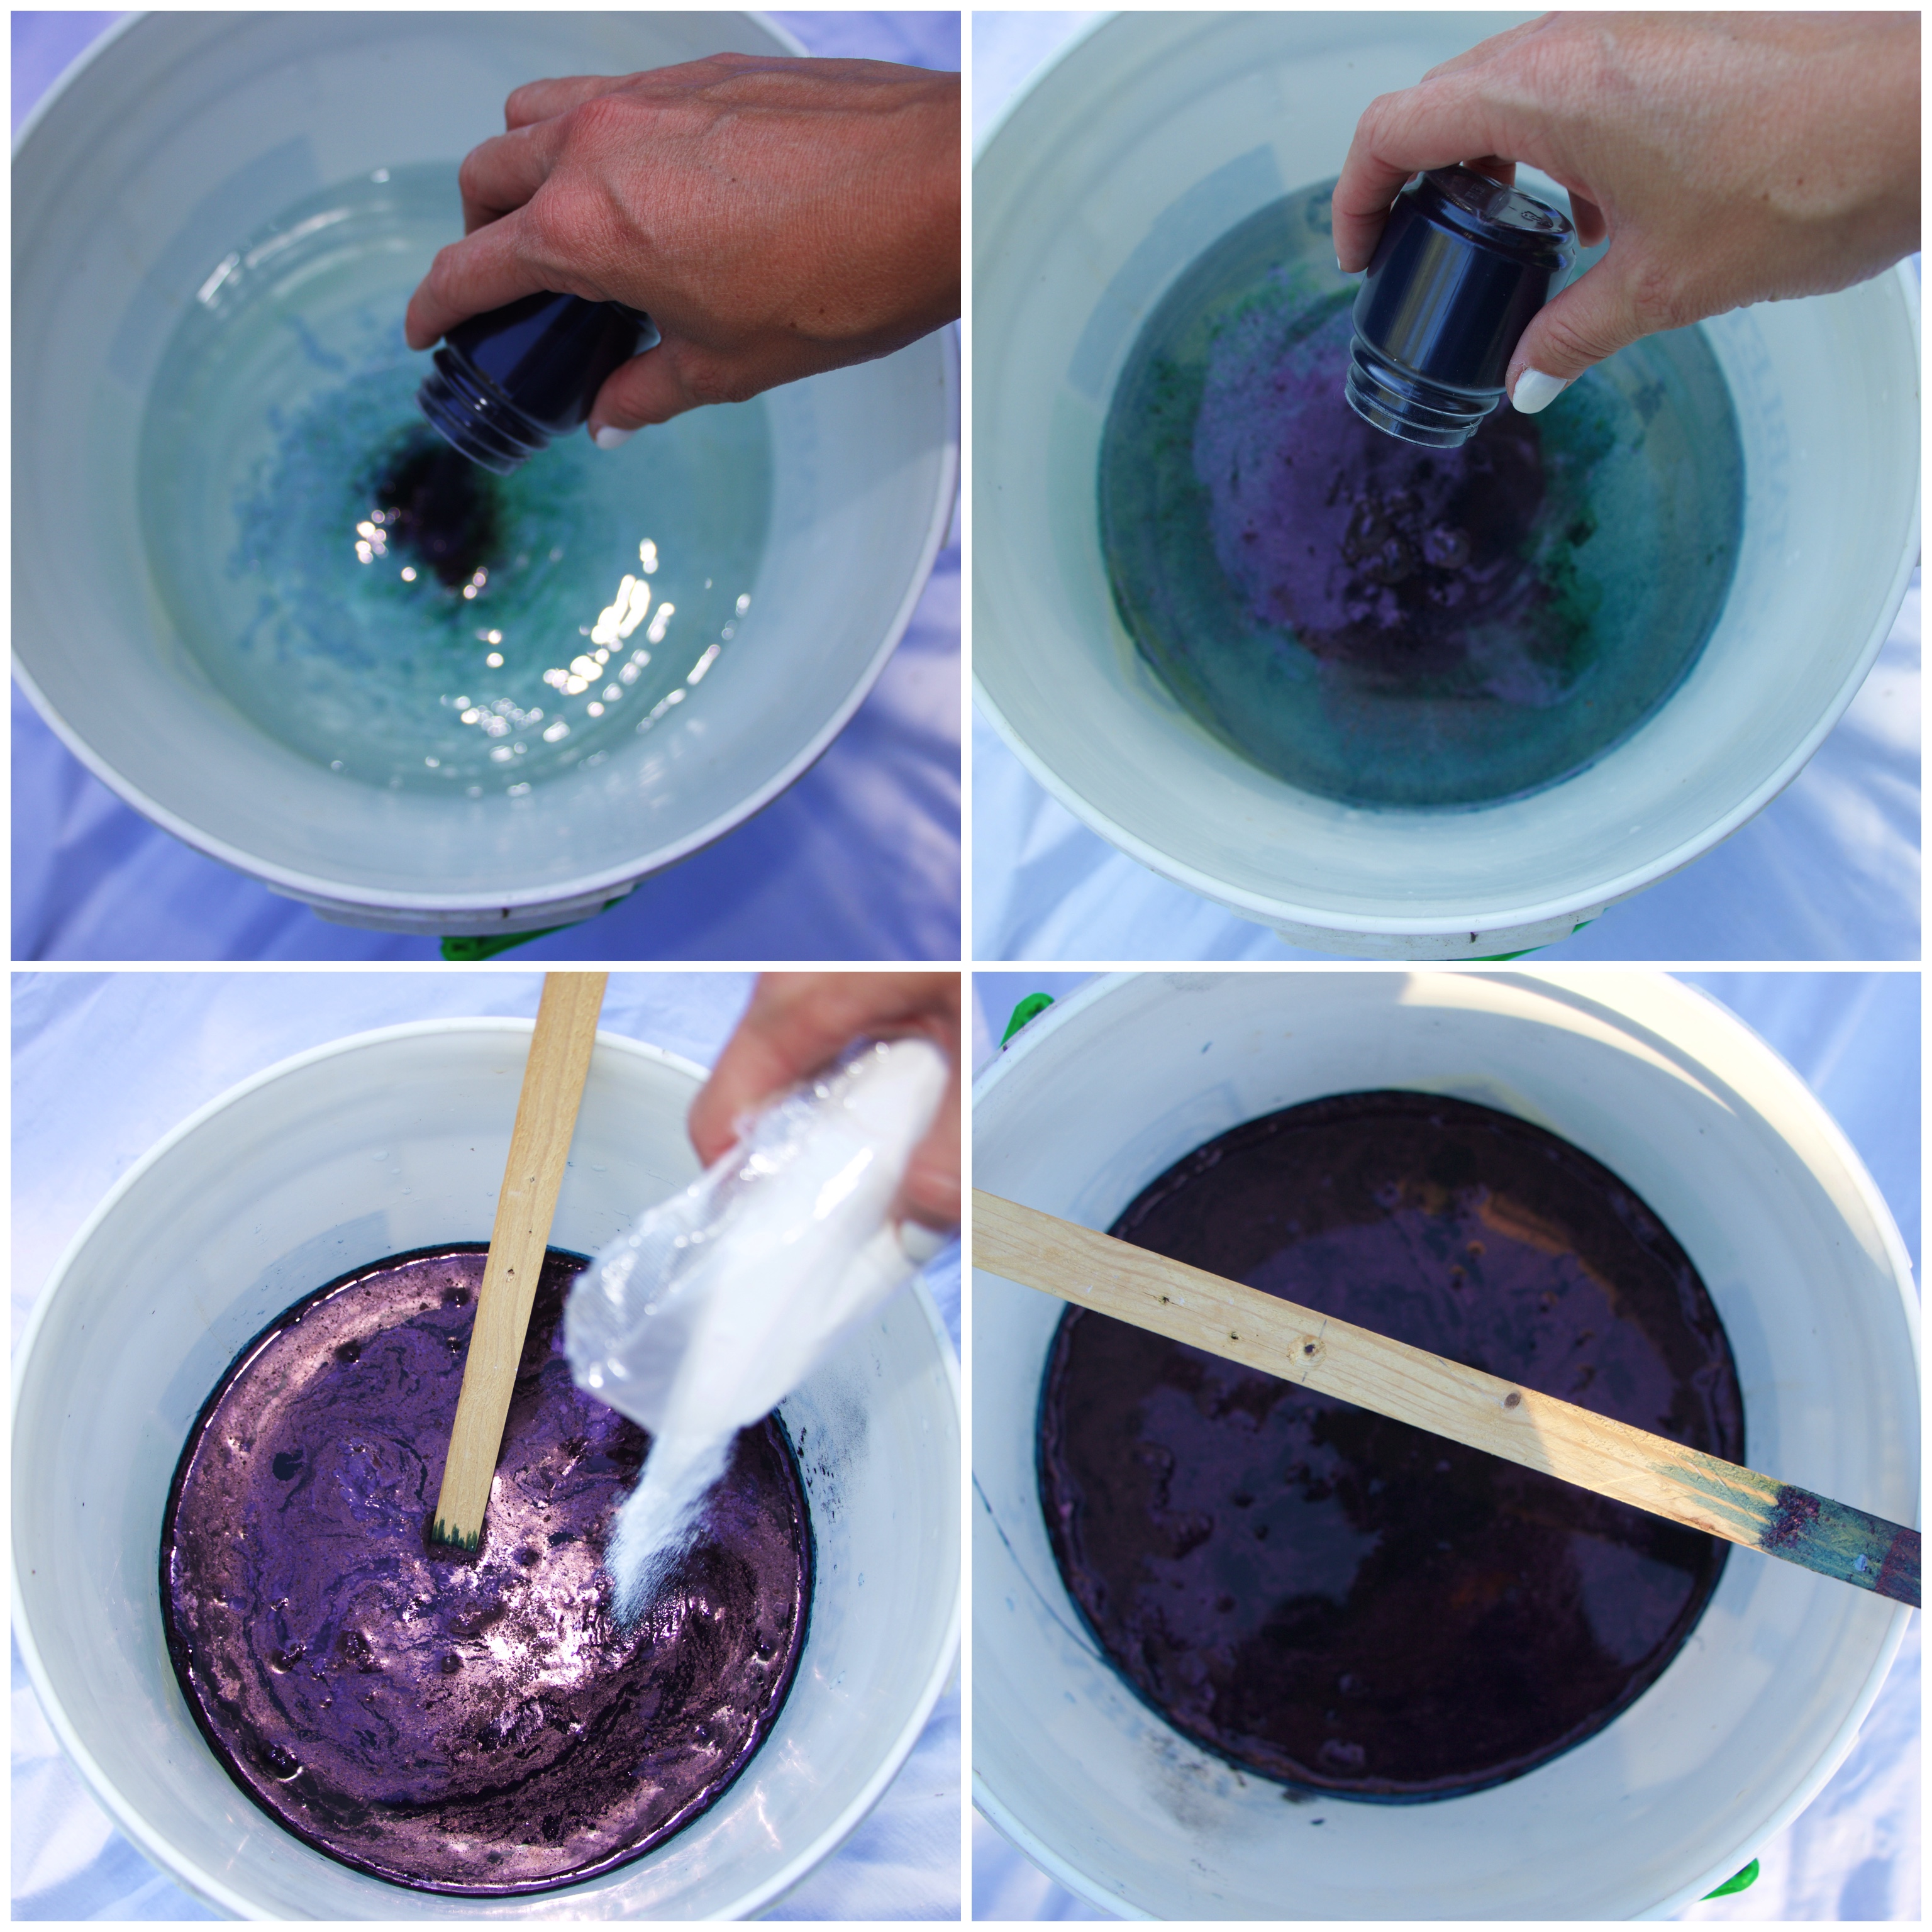
Take it from a girl who has her fair share of mishaps – read the directions. I often get excited to start, but I’m no chemist and I want to be sure my DIYs come out as beautifully as I imagine. So, before I started folding the cloth, I started my vat of indigo by following the instructions included within the kit. It takes approximately 20 min of rest before you begin to dye your cloth. While it is mentioned within the kit, learn from my mistakes! I can’t stress enough to remember that the indigo dye is affected when exposed it to oxygen. Keep the container covered whenever possible. You will have to remove the “flower” (the kit will explain further) with a large spoon and set aside while you dip the cloth into the vat, you will replace it when done if you plan to re-use the vat over time. Avoid stirring aggressively when working with the dye, which would add oxygen into it.
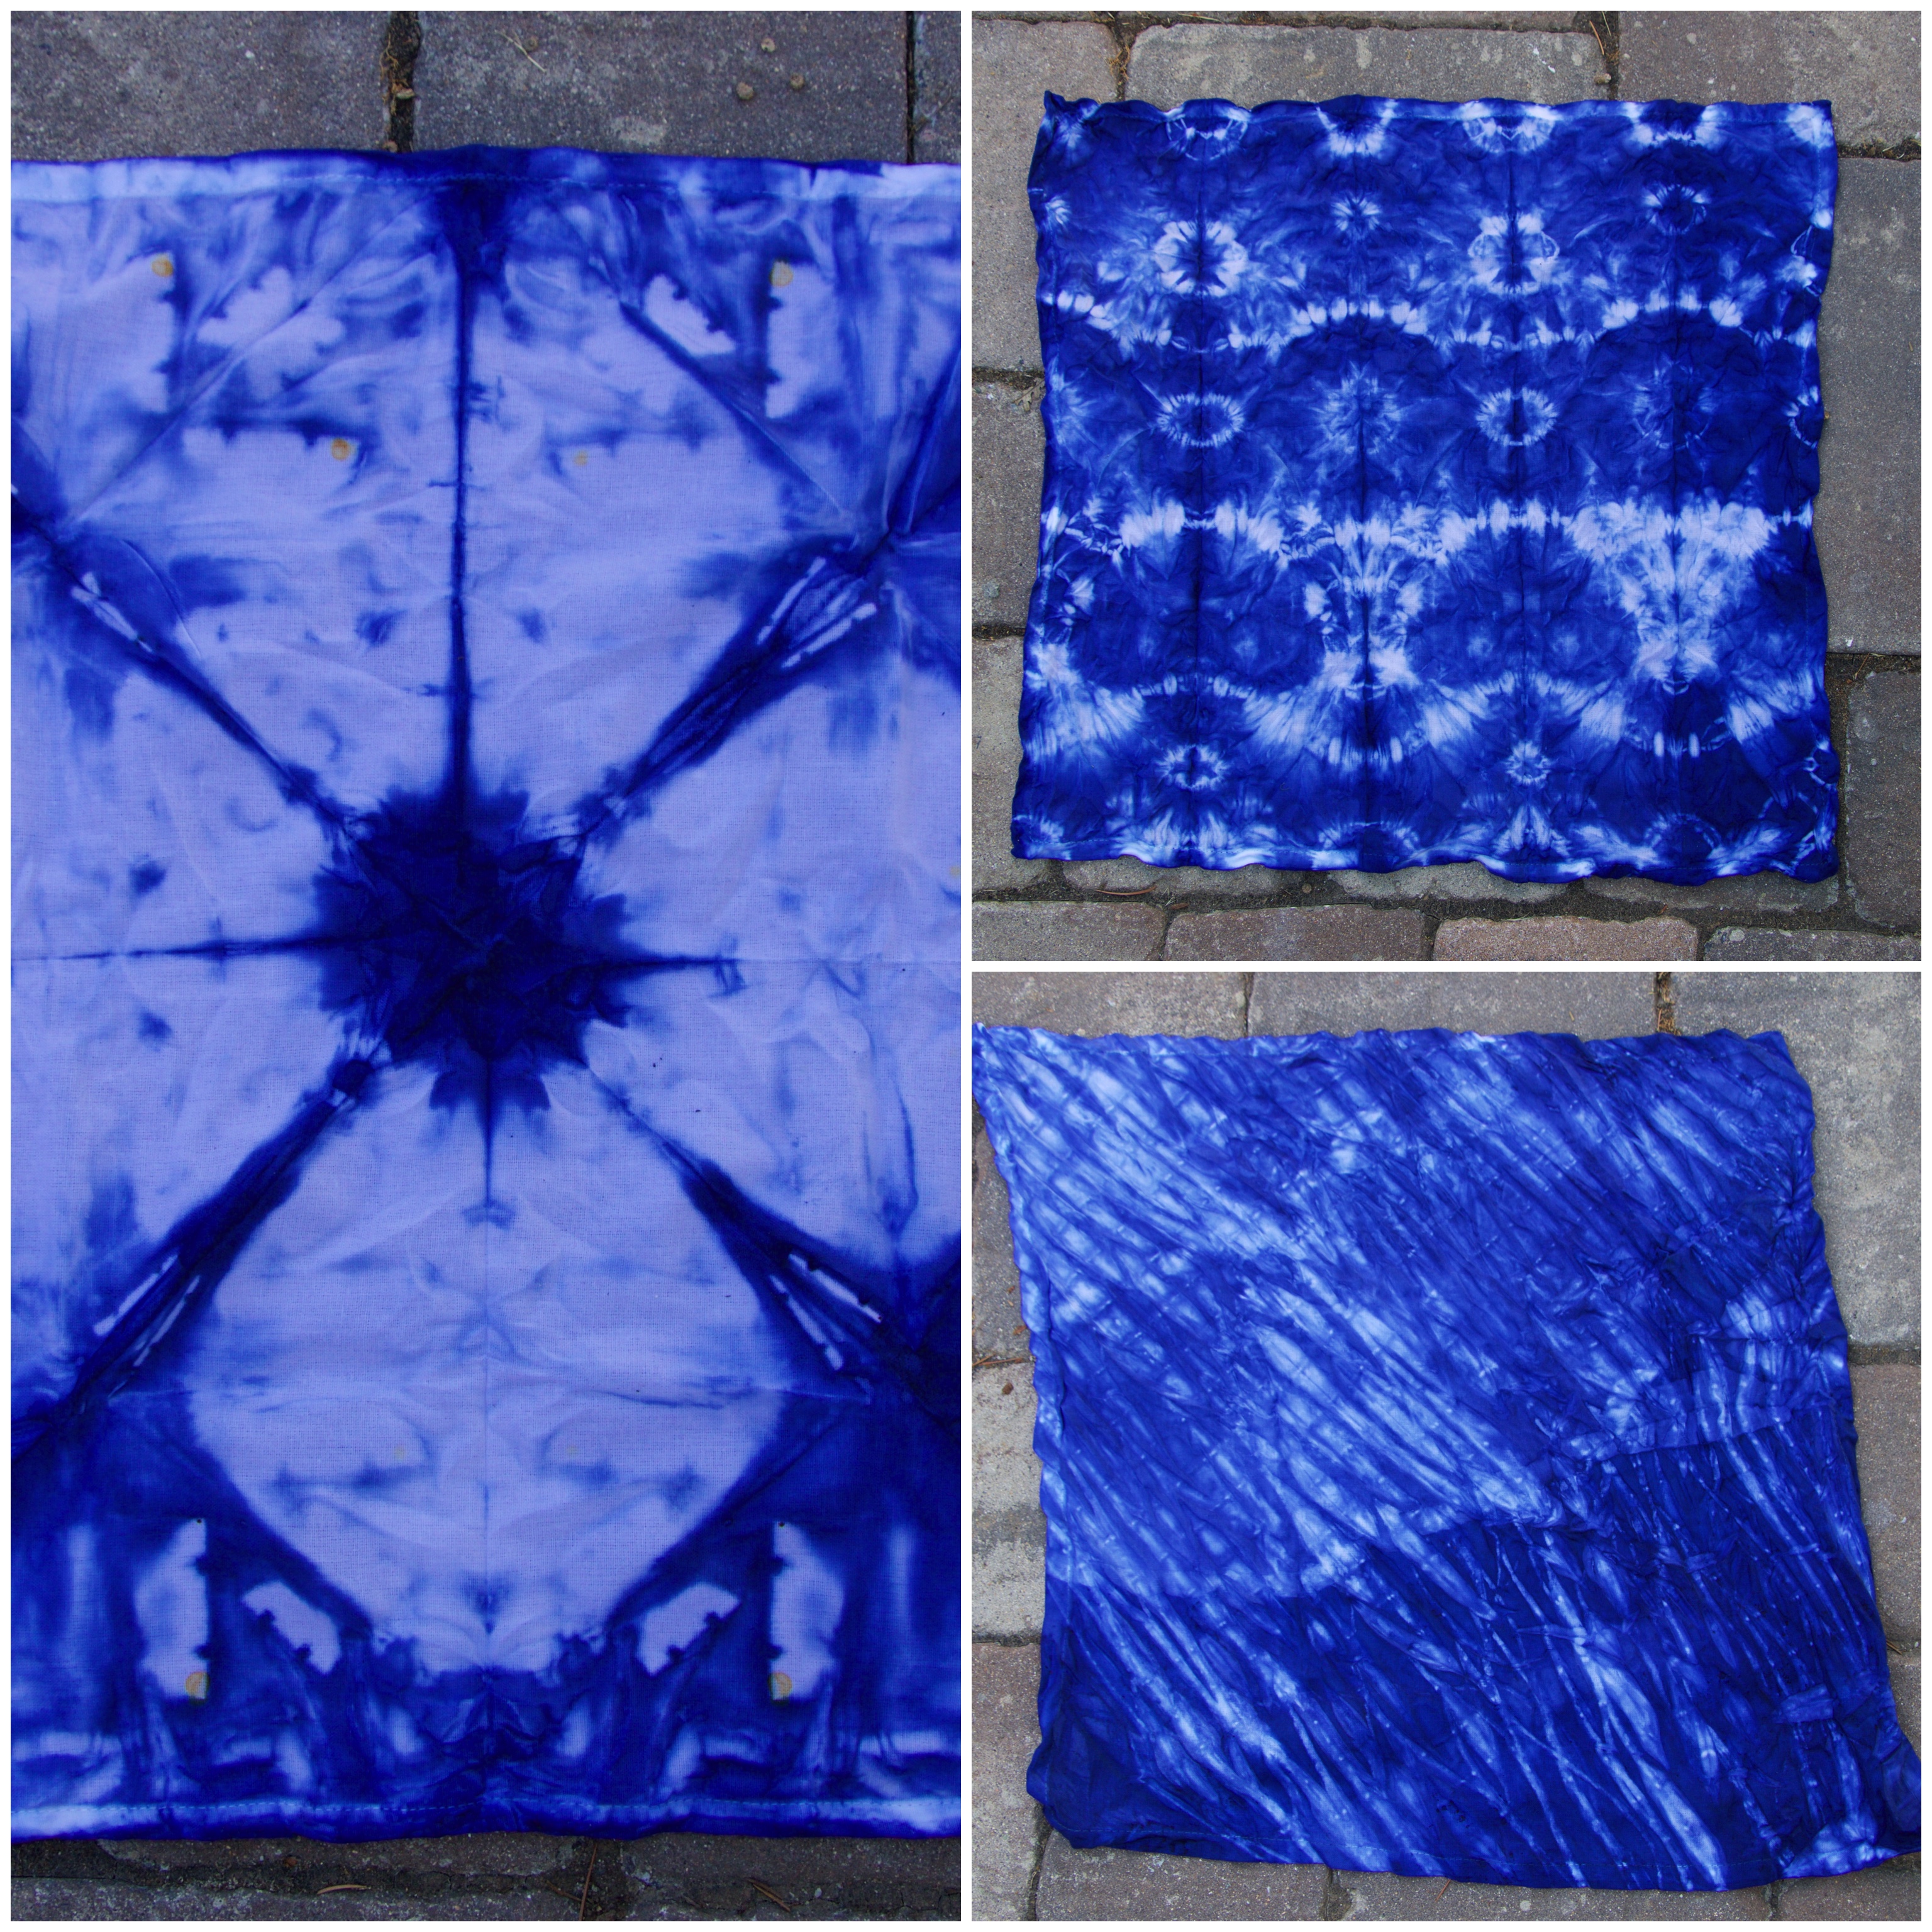
I selected three techniques to create interesting patterns that will all compliment each other for the new napkins I was envisioning. While I used the same technique for multiple napkins, each turned out vastly different from the next, and I loved the result.
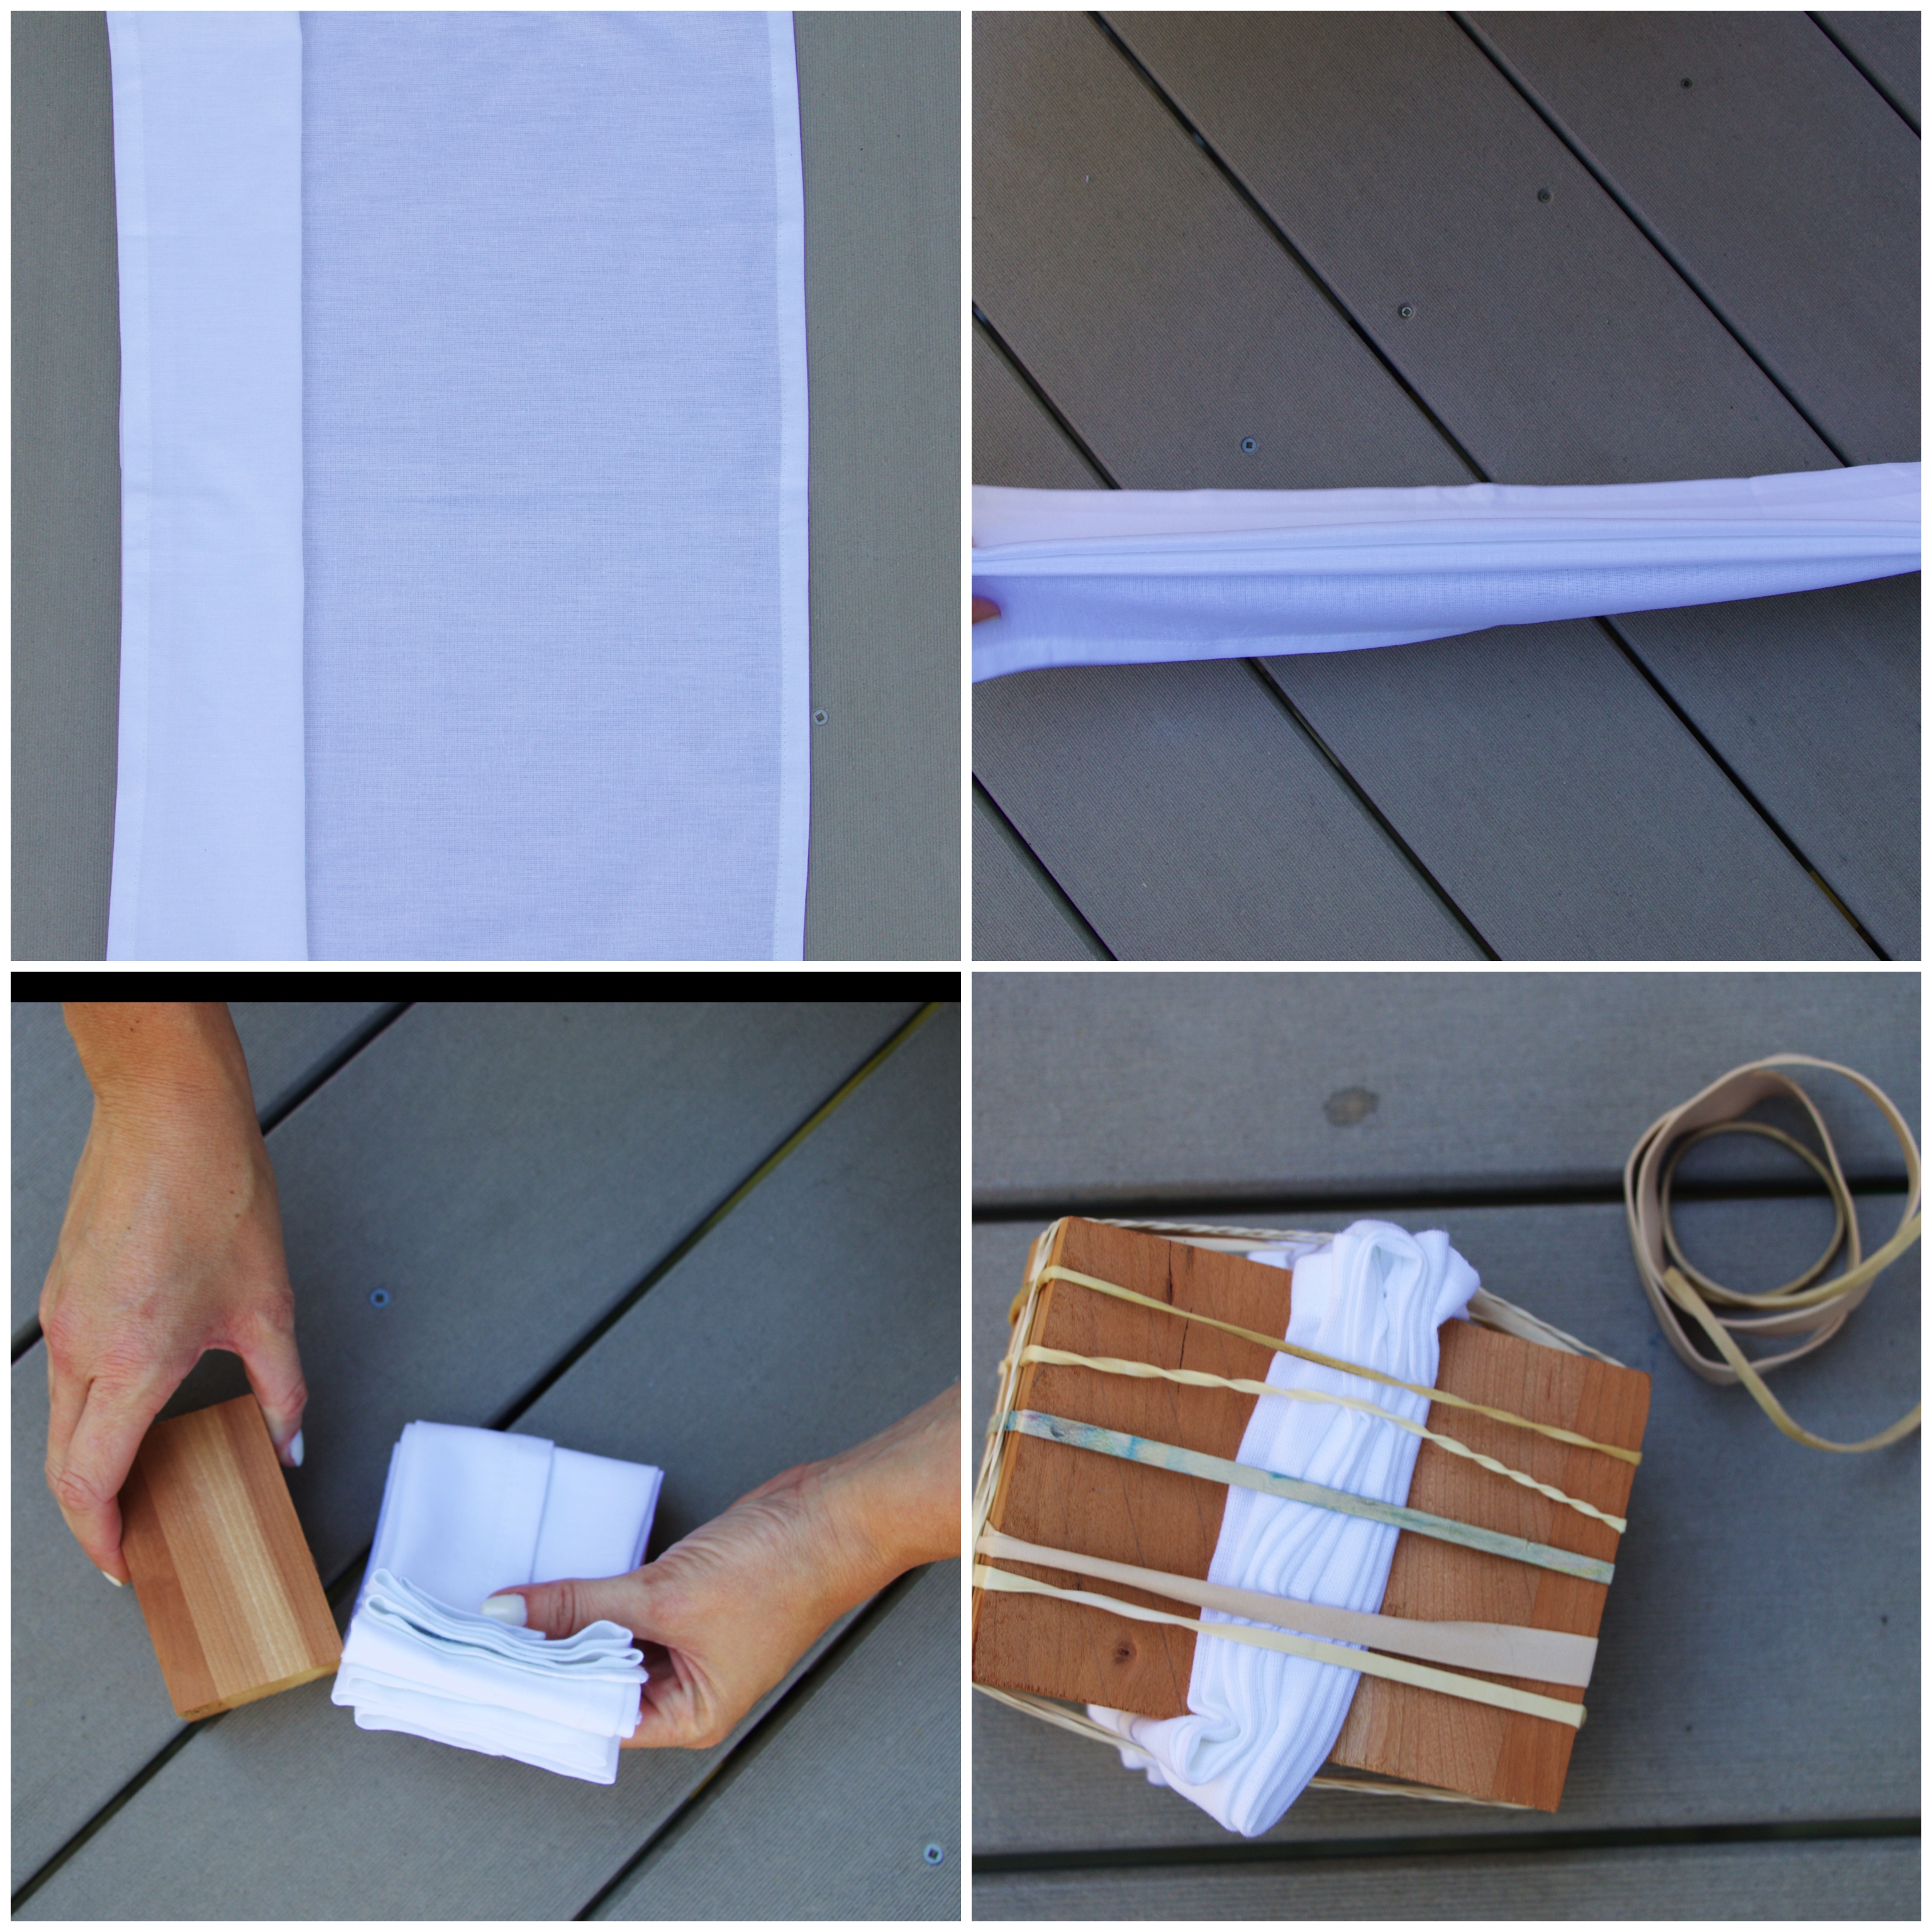
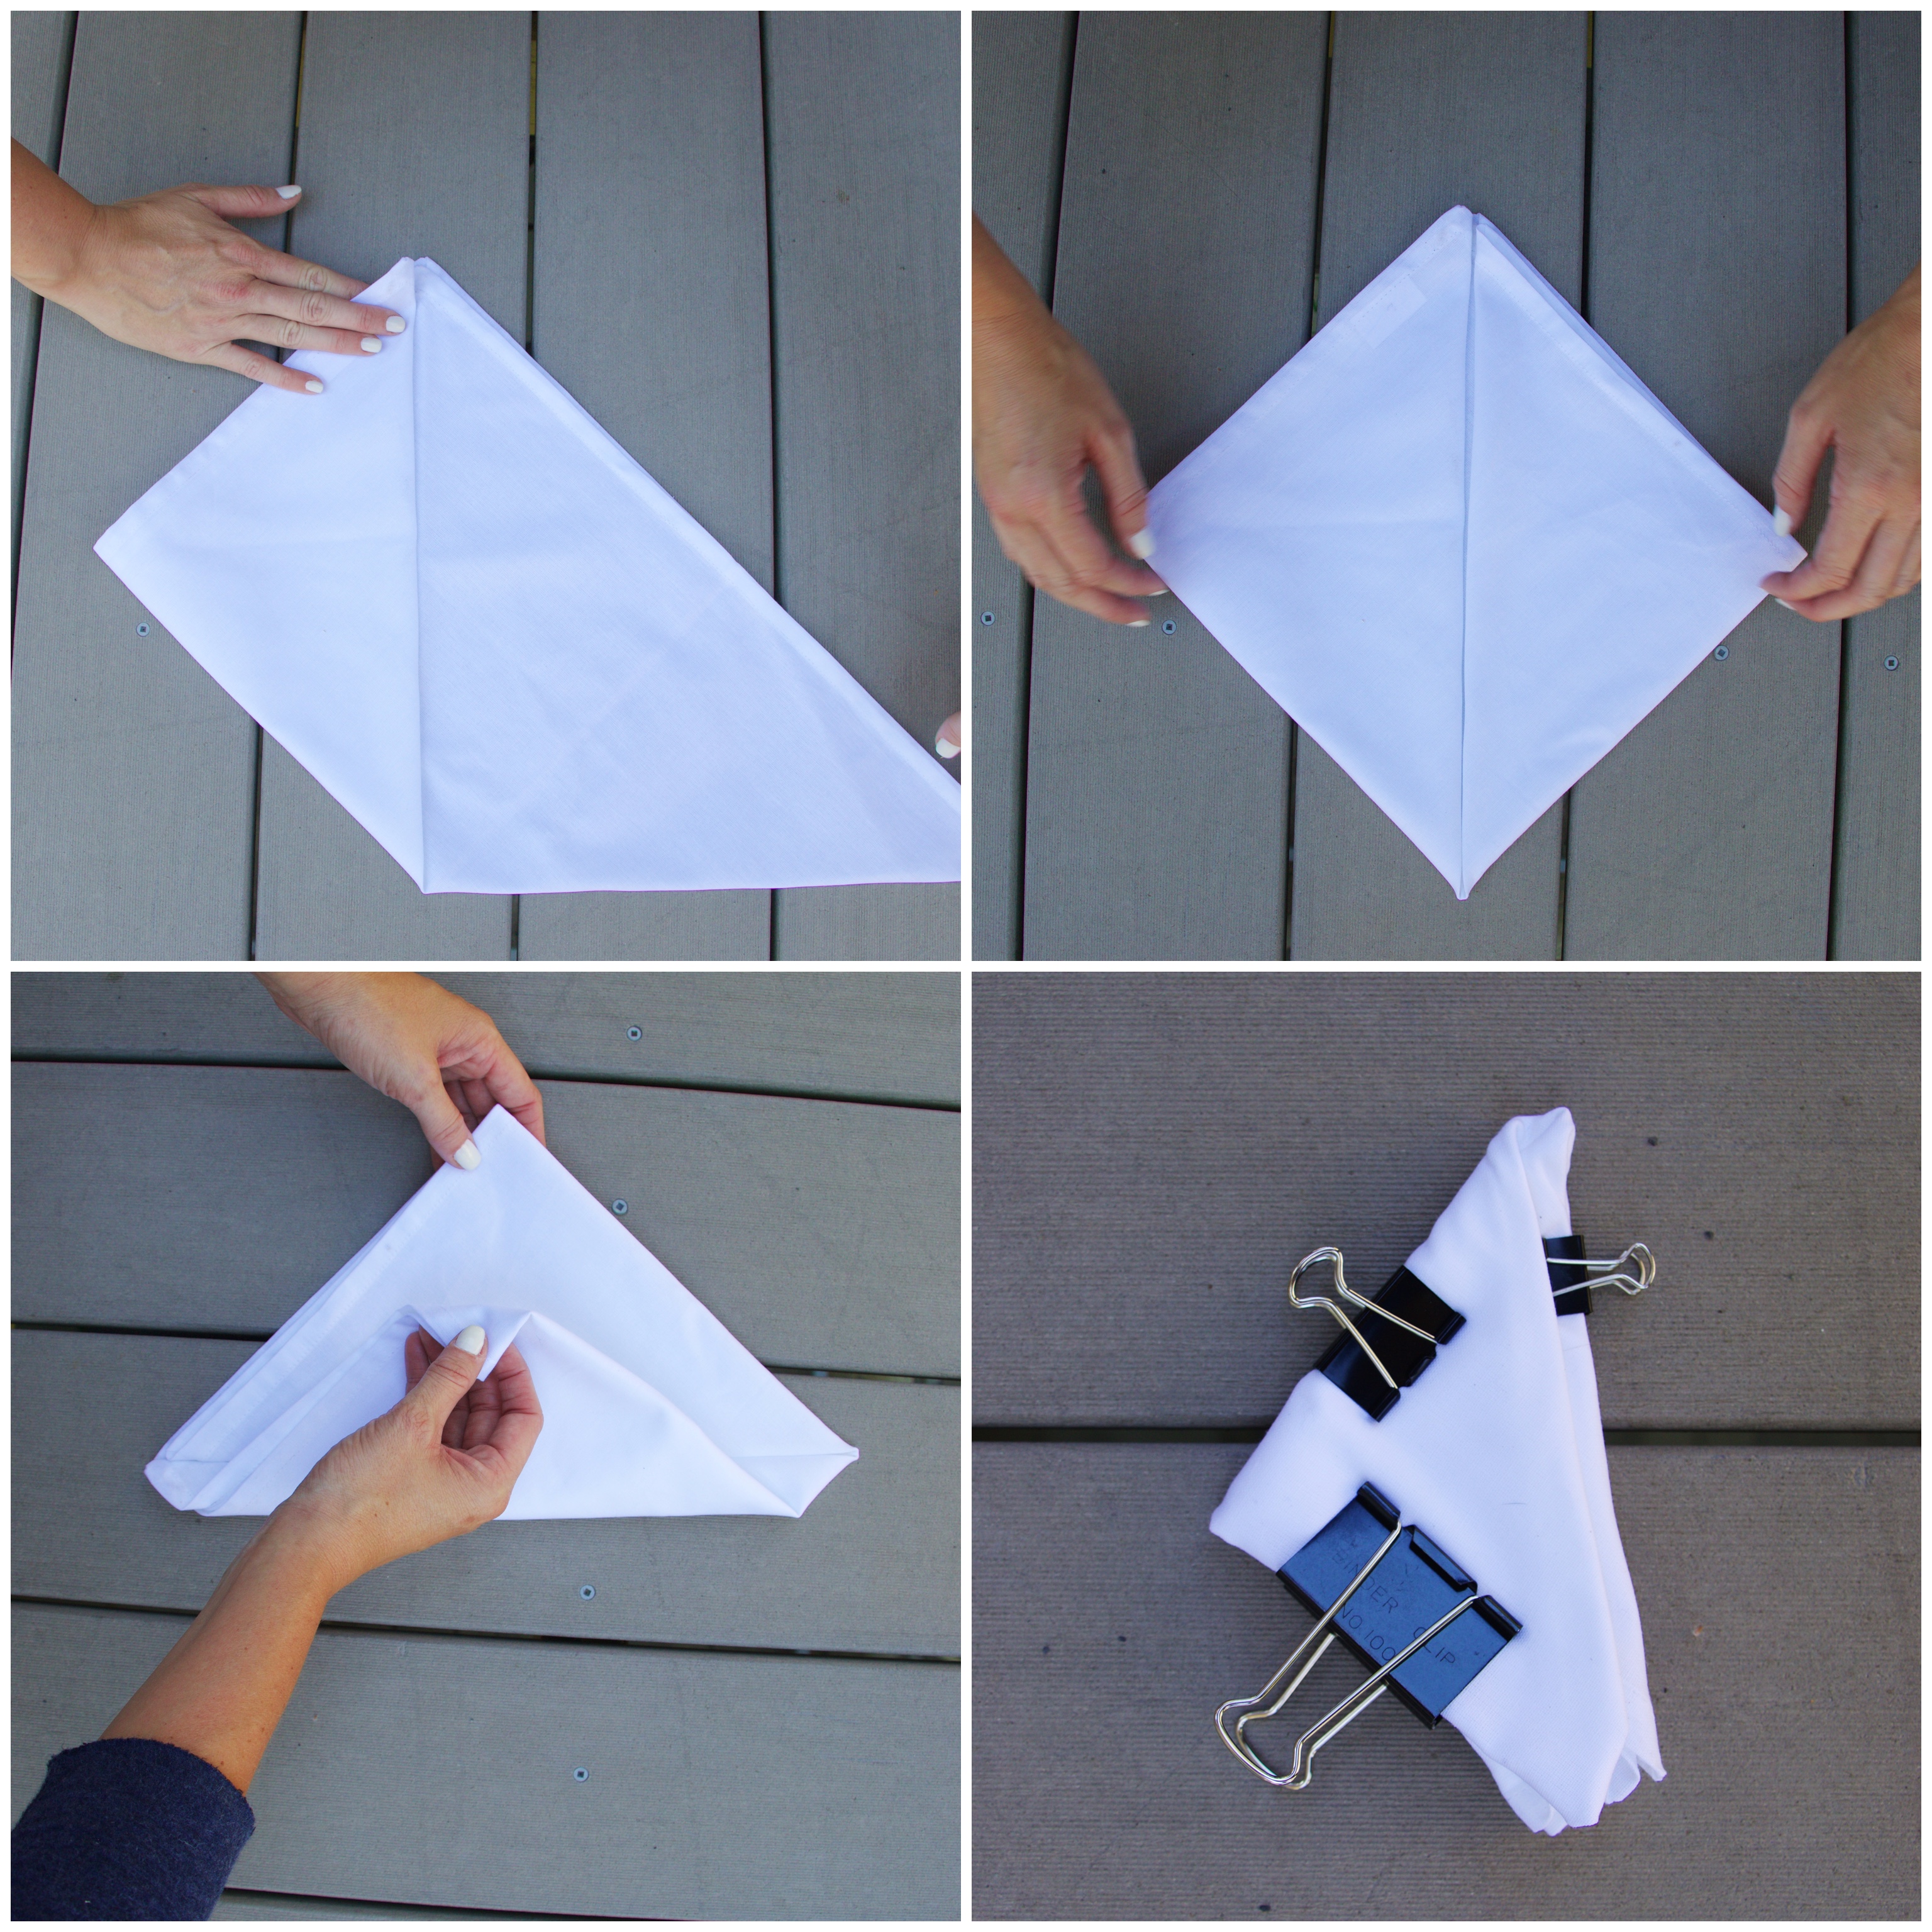
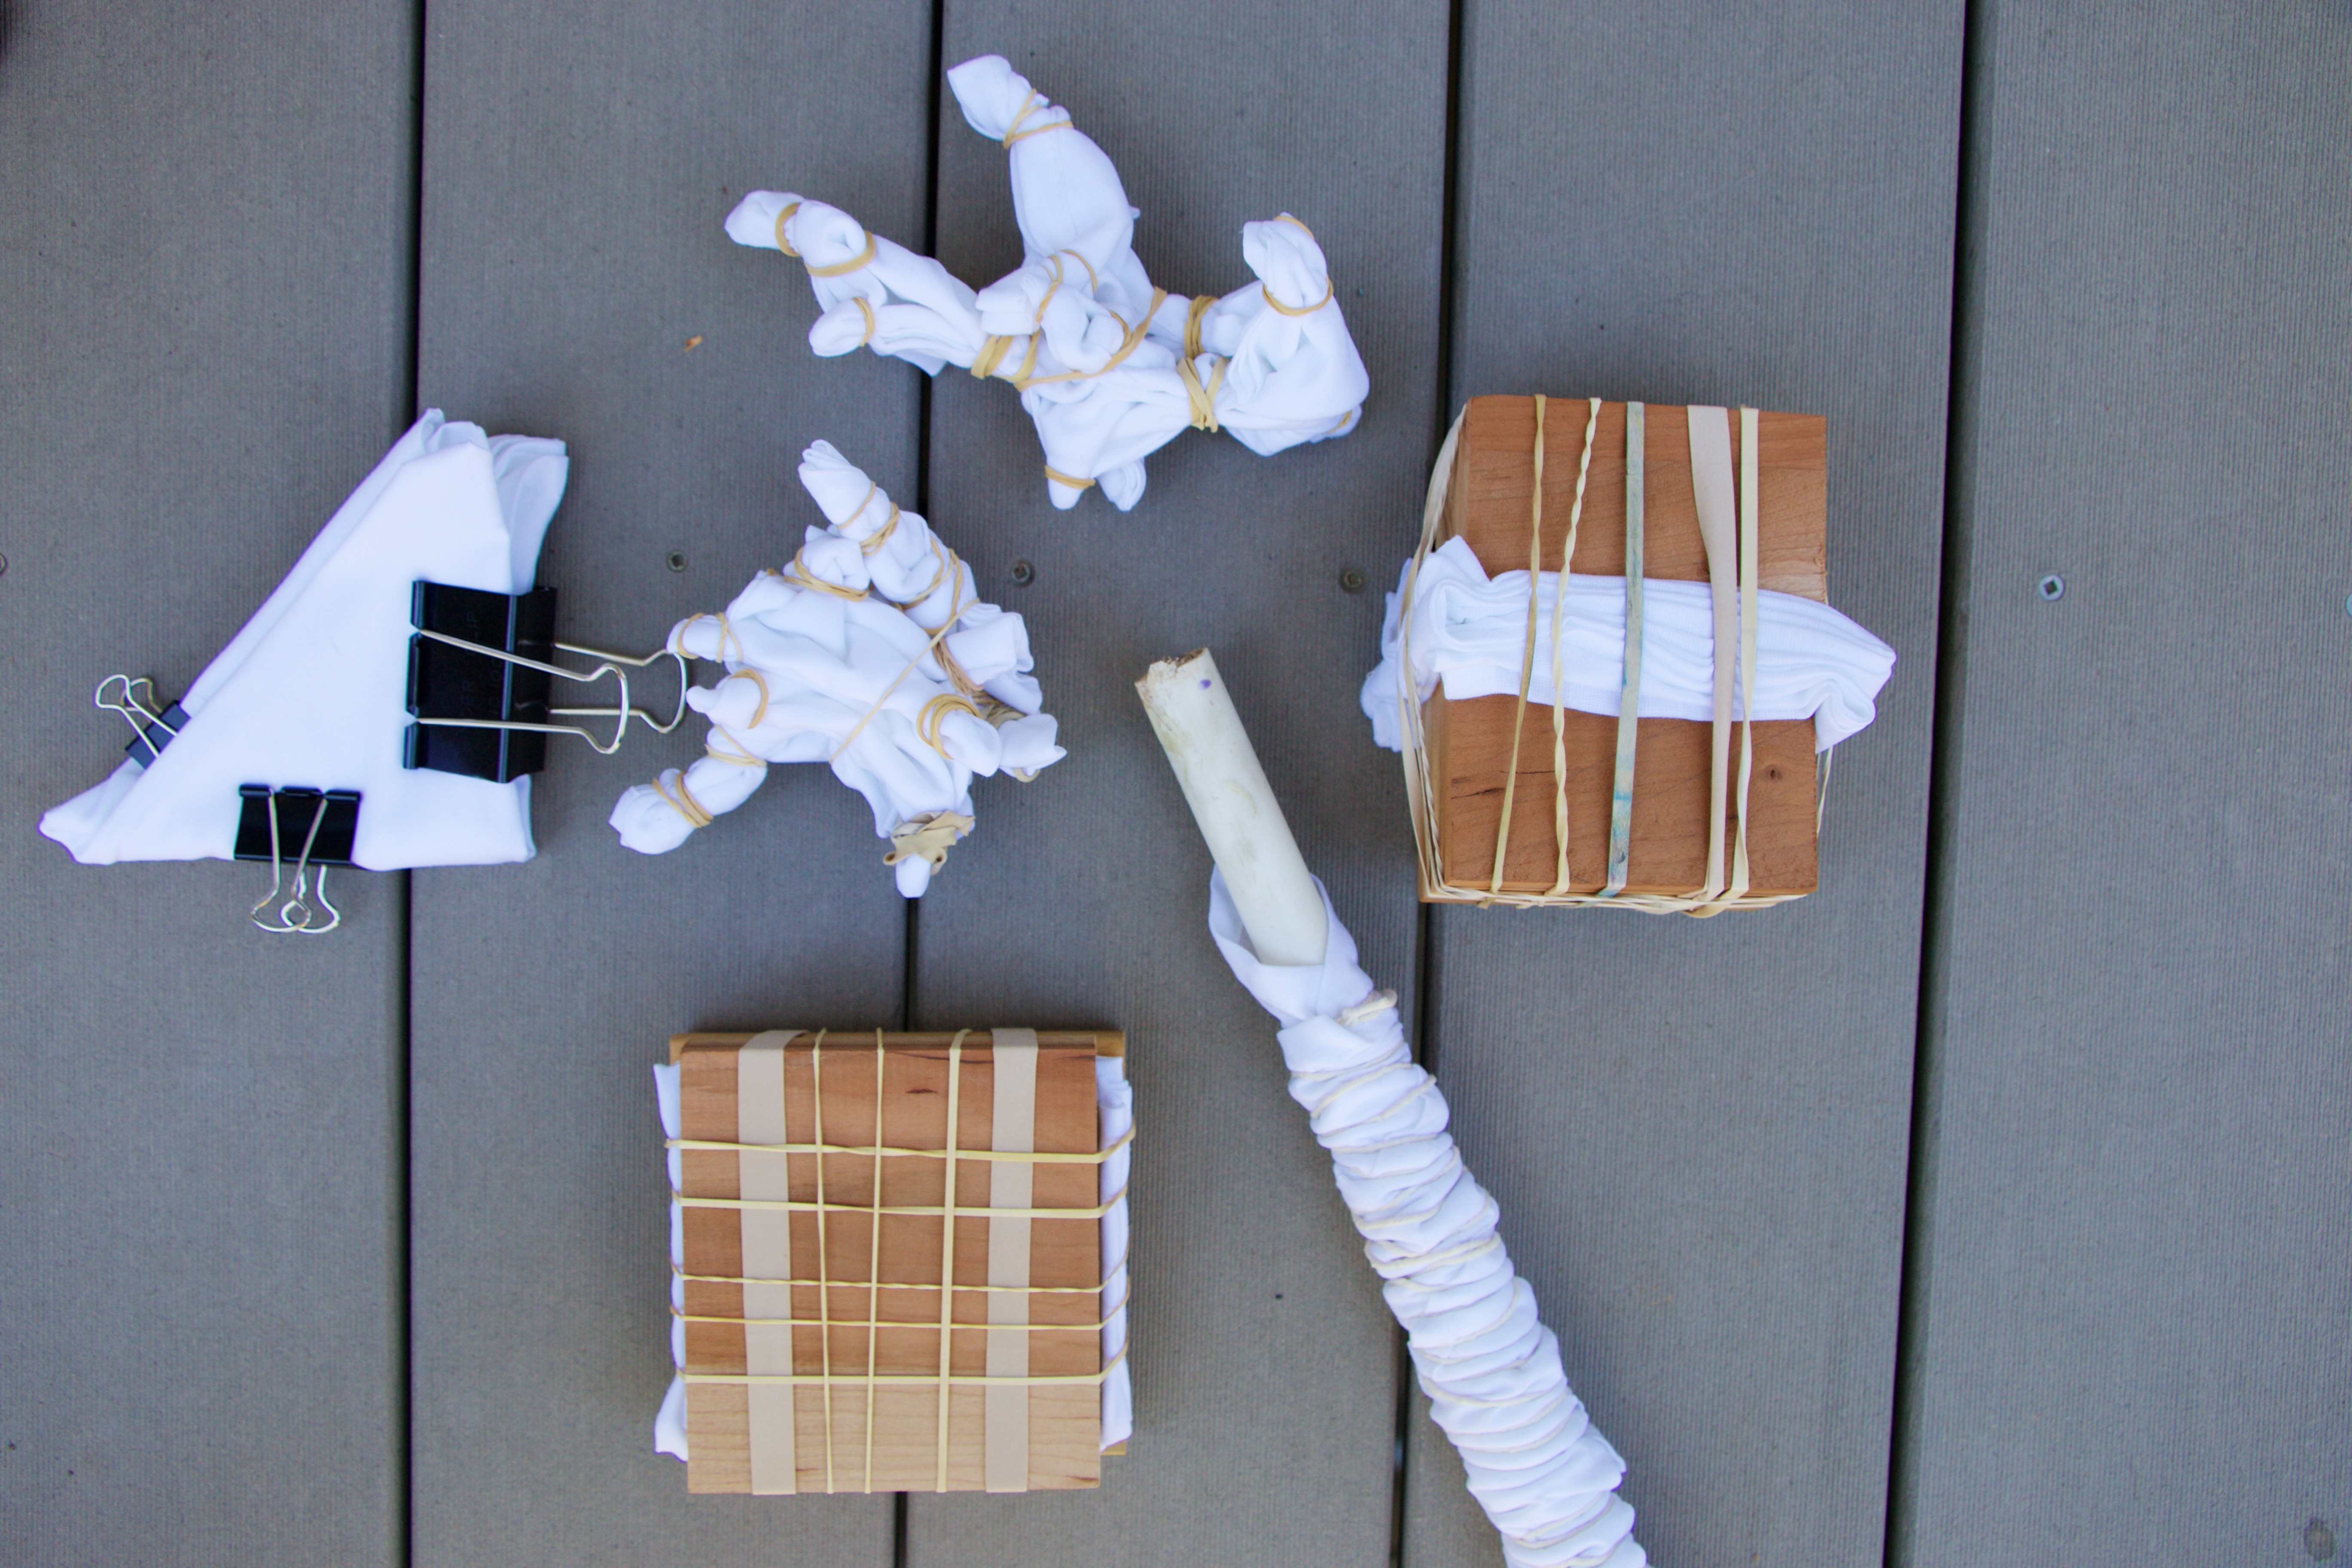
Itajime shibori: is a shaped-resist technique. The cloth is folded like an accordion and placed between two pieces of wood. I used rubber bands to secure the folded material around the wood pieces. I used this same technique, however, I folded the material into long strips in an accordion style as well as using the triangle shape. I secured the shapes with c-clamps and butterfly clips.
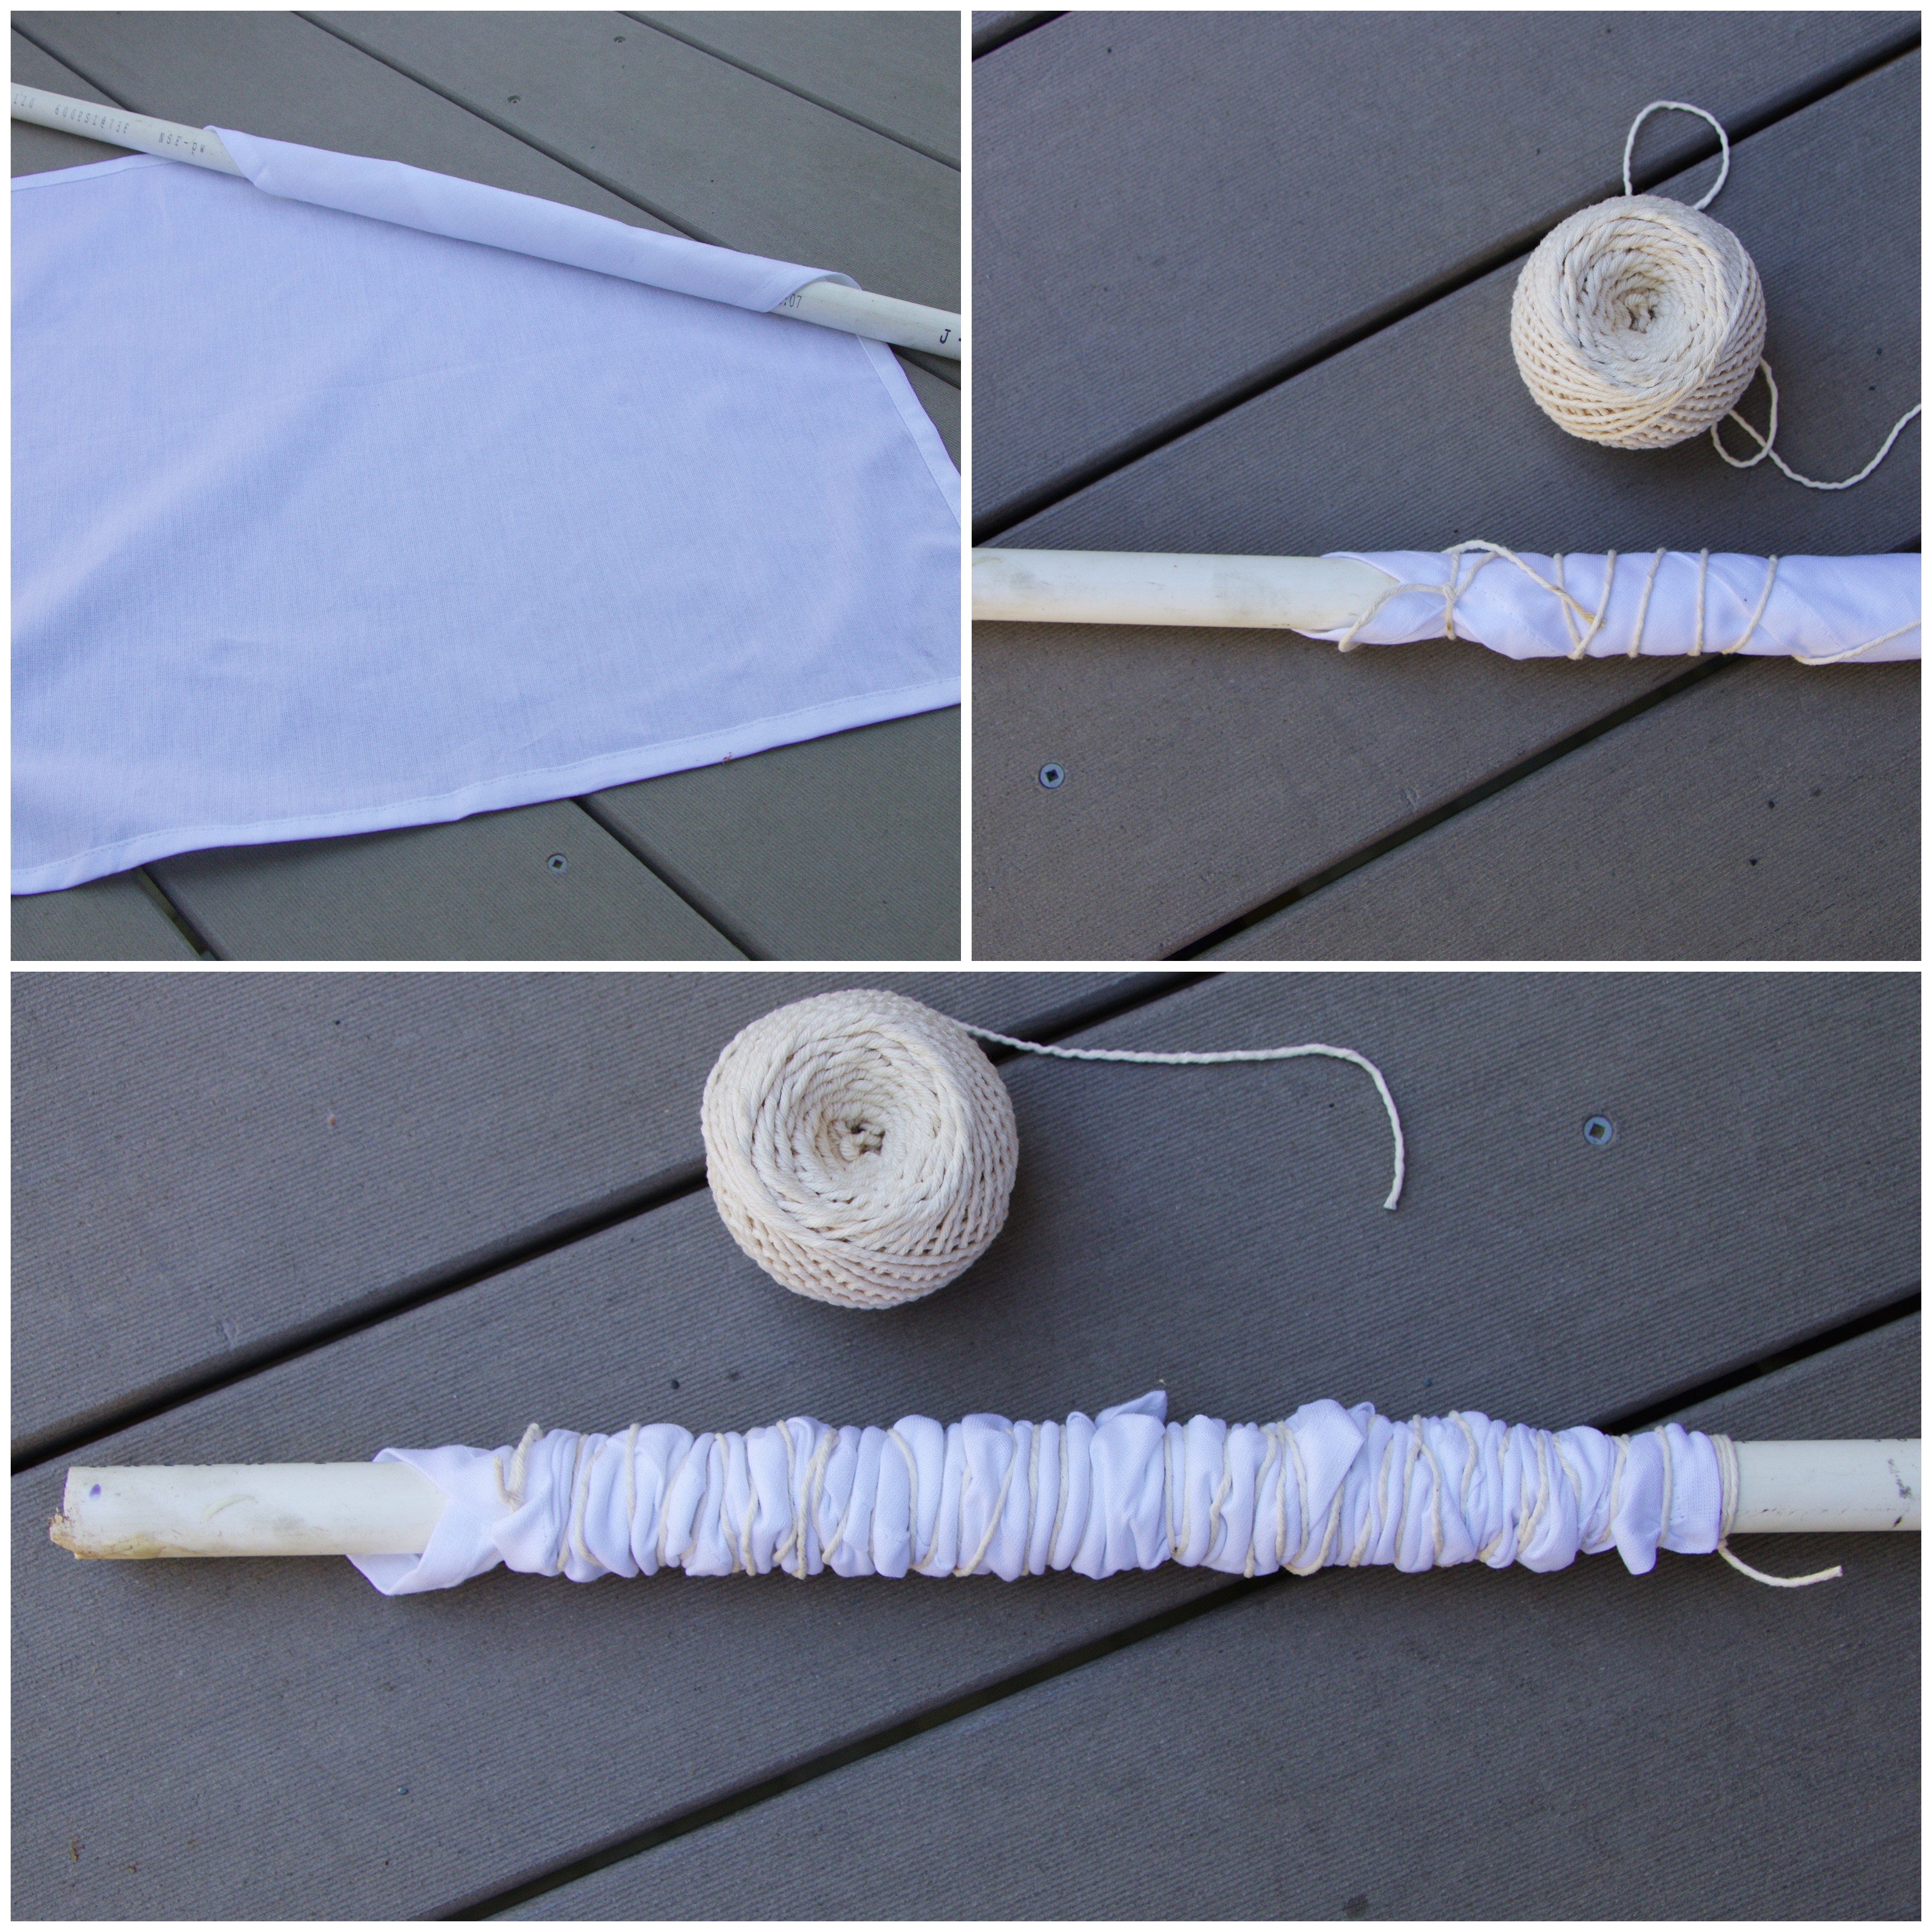
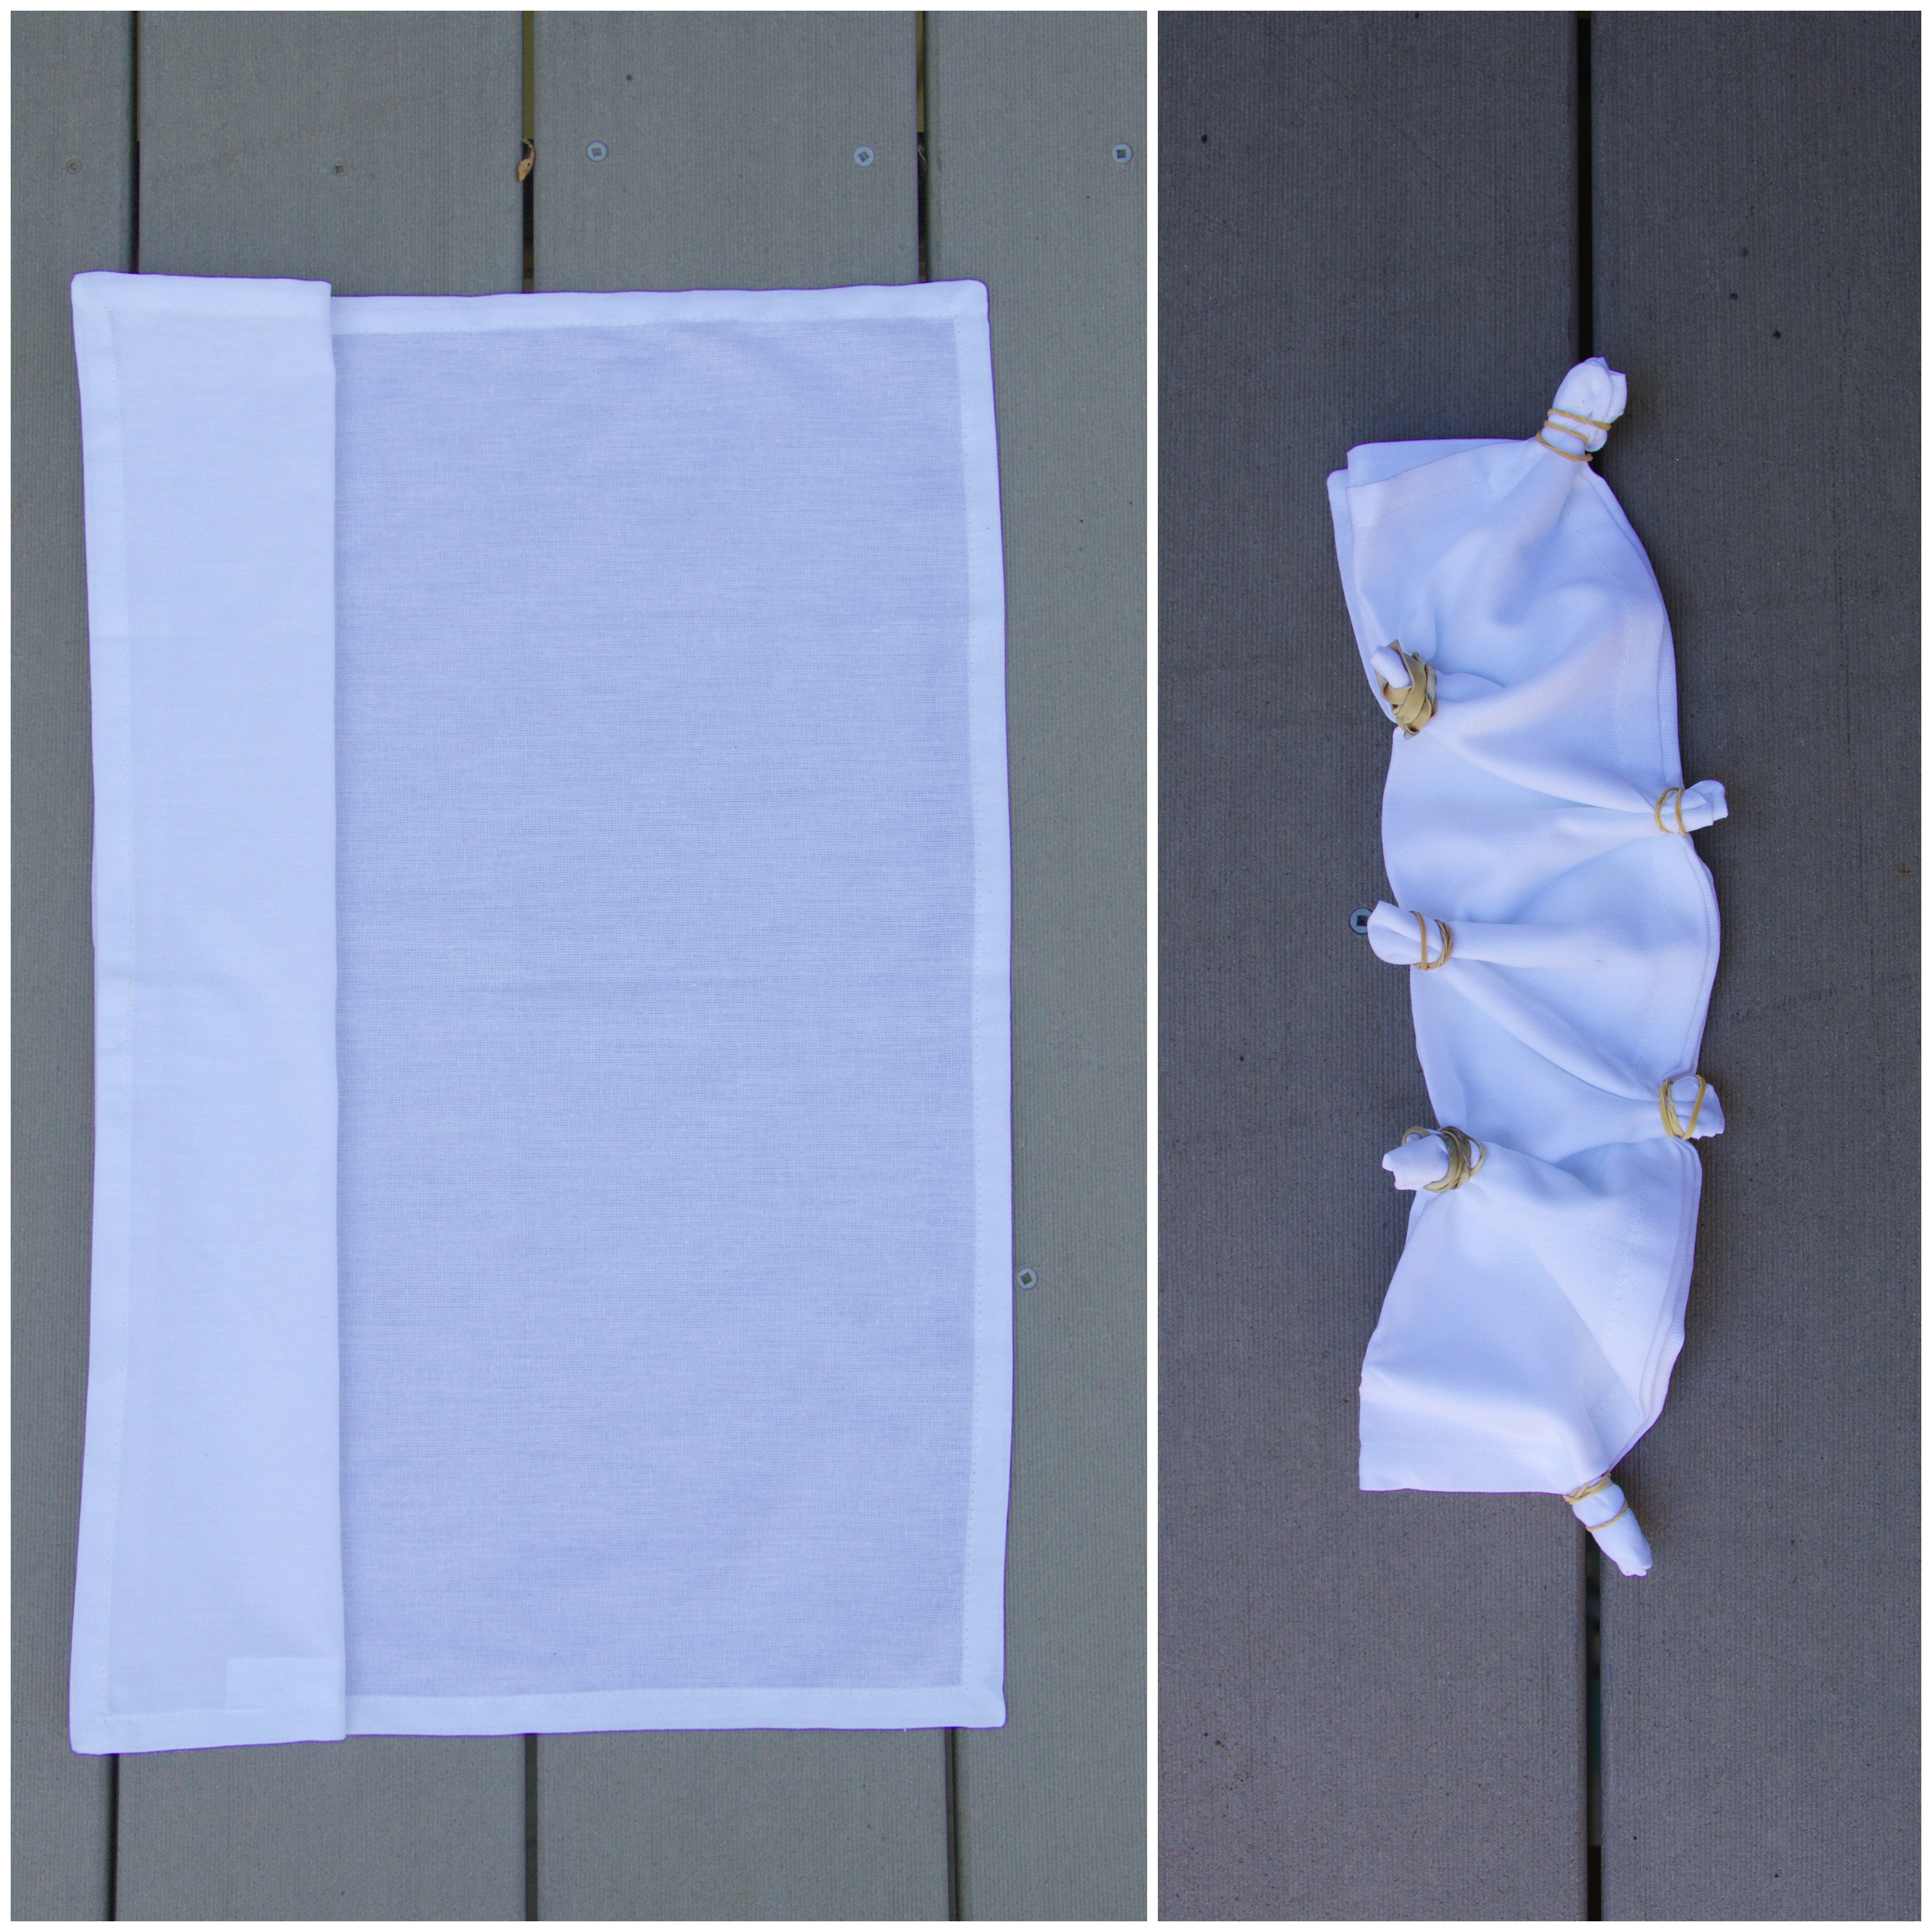
Arashi shibori: involves wrapping the cloth on a diagonal around a pole. I suggest wrapping the pole approximately 10 times and then scrunching the material down the pole and repeating. The result is a pleated cloth with a design on a diagonal.
Kanoko shibori: is the technique you are most likely to recognize, known in the west as tie-dye. The pattern is dependent on how tightly bound the cloth is and if it is random or a strategic pattern. The beauty is of this technique that it will always turn out as a work of art! I folded the cloth and then bound bunches with rubber bands.
Now you are ready to dye your material! Start by completely soaking the material in the first bucket of clean water. Wearing rubber gloves, I slowly dipped the material into the dye and worked the material slowly with my hands to avoid disturbing the dye and introducing more oxygen than necessary.
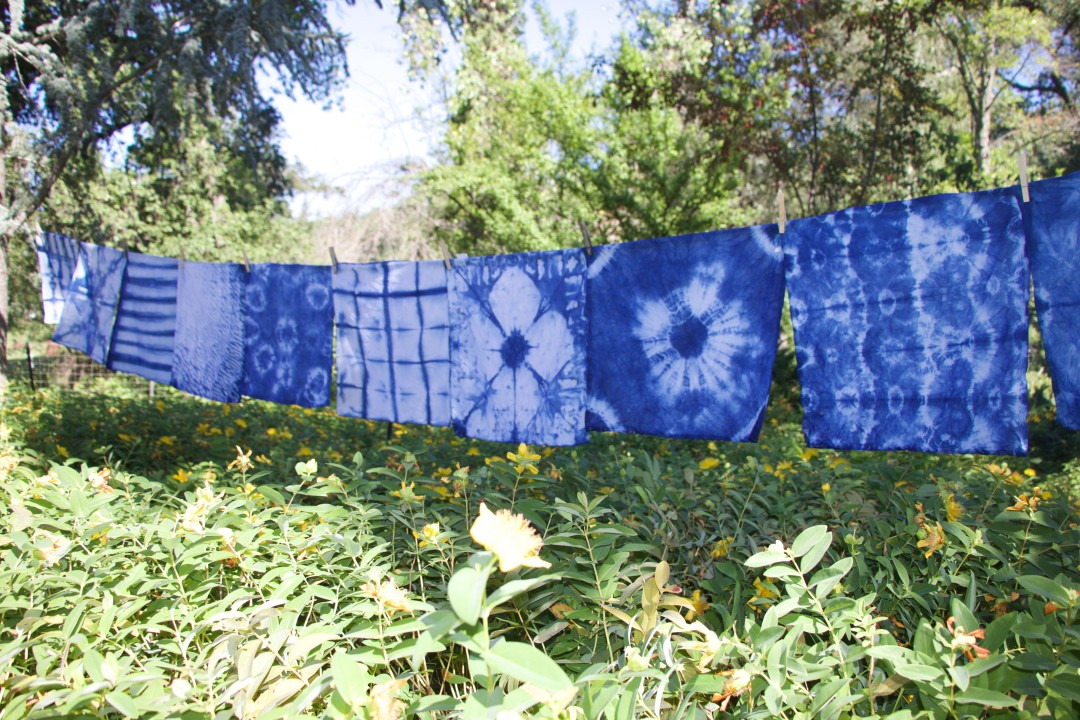
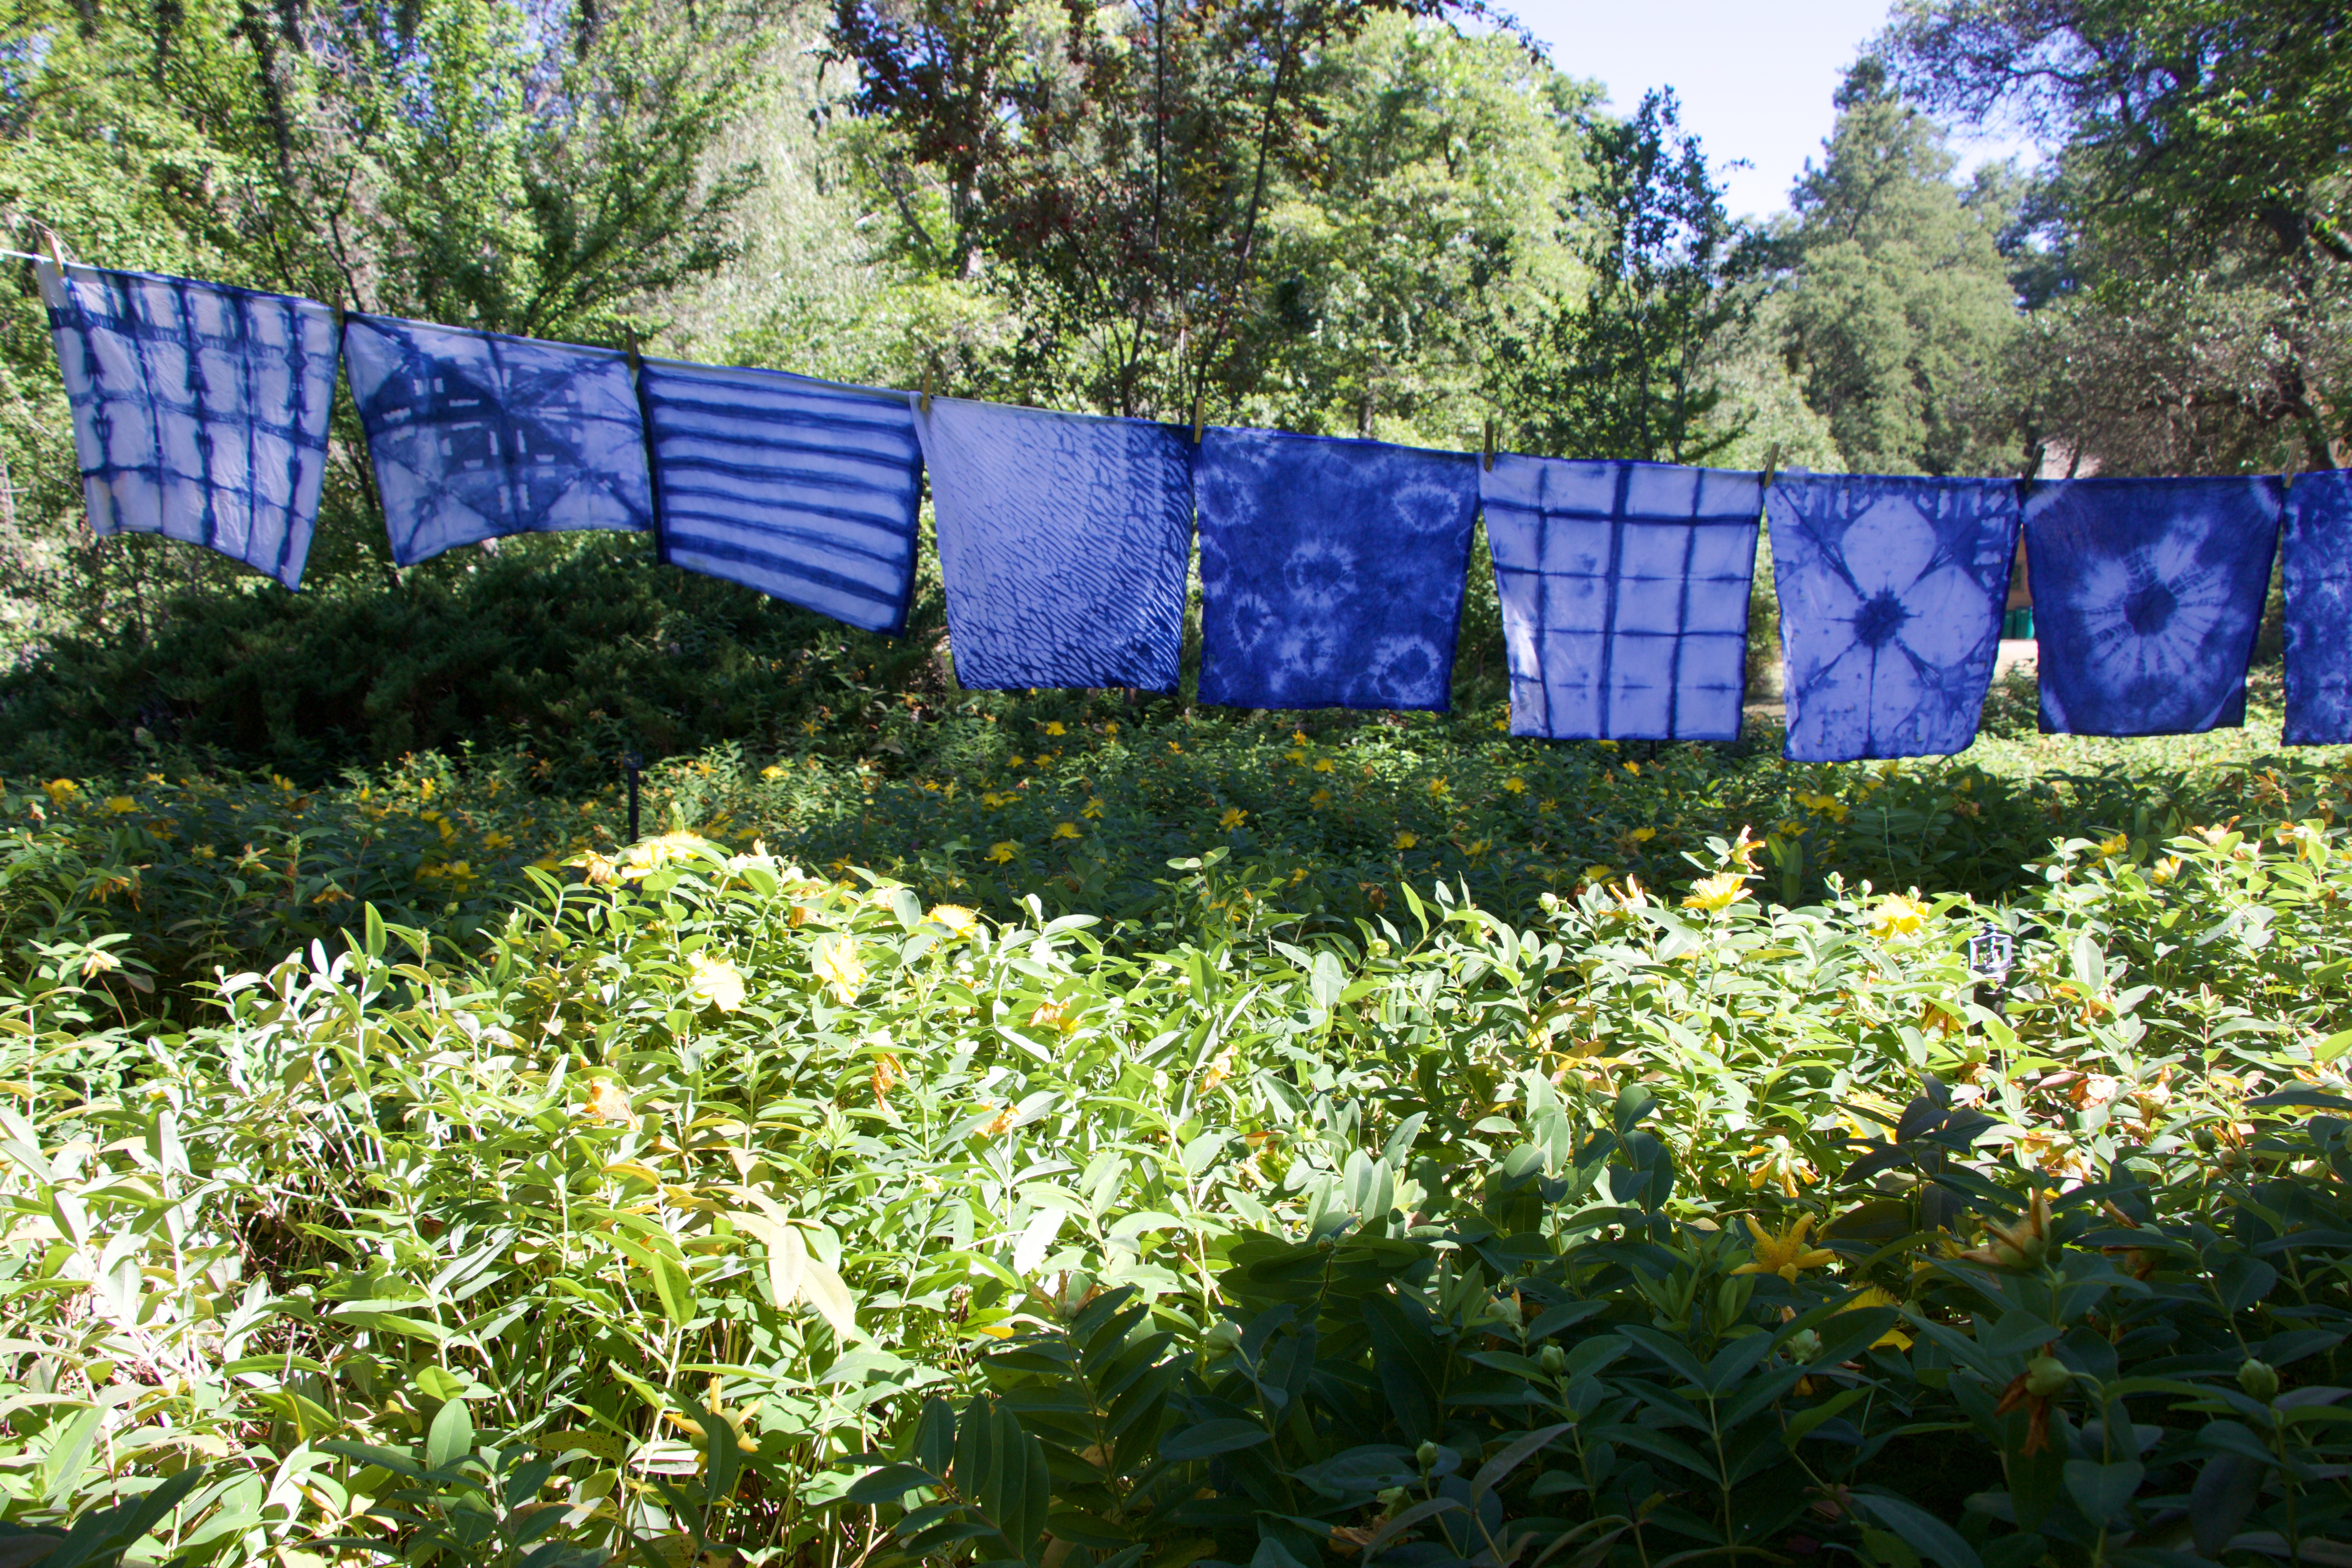
When you remove the material at first it will be a summer grass green color, but as oxygen hits the dye it will turn a rich indigo blue. The more times you dye the material the darker the blue tones will appear. I simply let the material dry bounded then repeated the dipping process (for a total of 2 times). I allowed the material to dry the final round then unbound them and soaked them in clean water, then I hung them up to dry in the heat of the summer sun.
While I decided to get fancy with some cotton napkins, I would encourage you to try this DIY project for pillowcases, scarves, and clothing – the options are as endless as the summer sun!
– I hope you enjoyed this manicured take on Shibori!