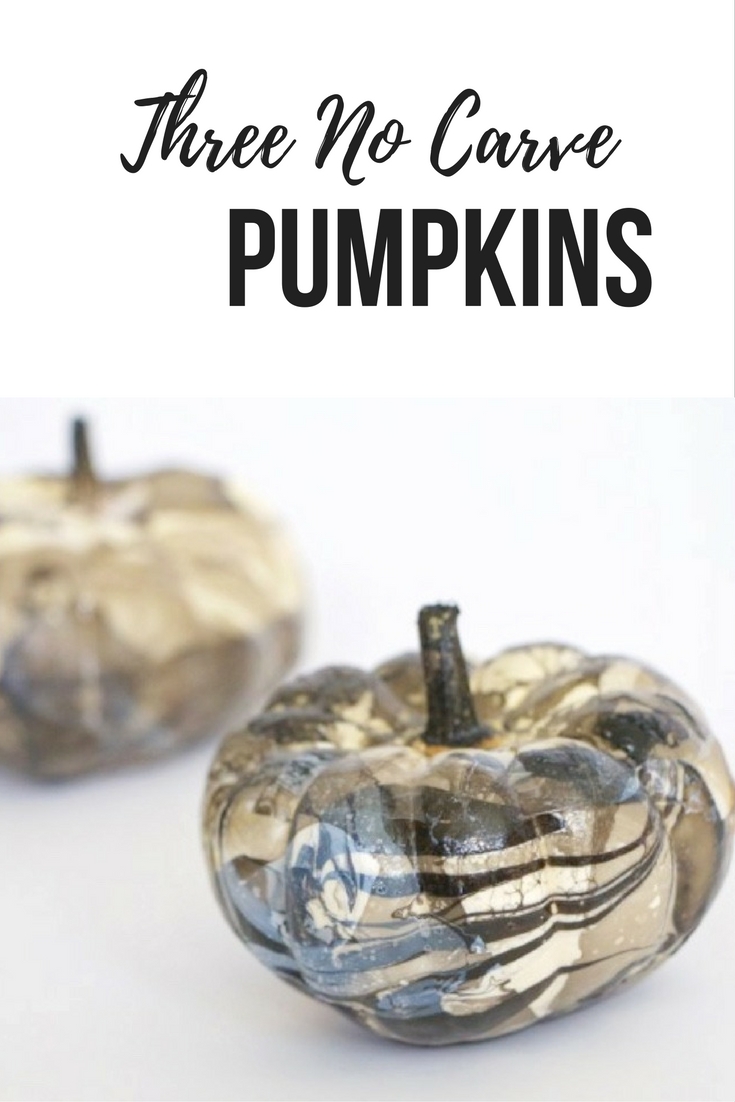
Recently, we embarked on some fall adventures (see here and here). I love this time of year: hot toddy’s, Halloween decor, leaves changing color and the crisp air (even though the last two have yet to arrive due to our Indian Summer, but you get the idea – it should just be another week or so now). Living in San Francisco, I don’t have a ton of storage space for seasonal decor, but pumpkins make a cheap and easy way to bring the fall season indoors. I love traditions yet this year rather than carving pumpkins I branched out and decided to come up with three no carve pumpkin ideas that are just as fun for adults as they are for kids.
Marbled, decoupage and spray painted are three of my favorite ways to decorate pumpkins this year, and they’re so easy that everyone can join in – no sharp knives necessary.
Marbled Pumpkins
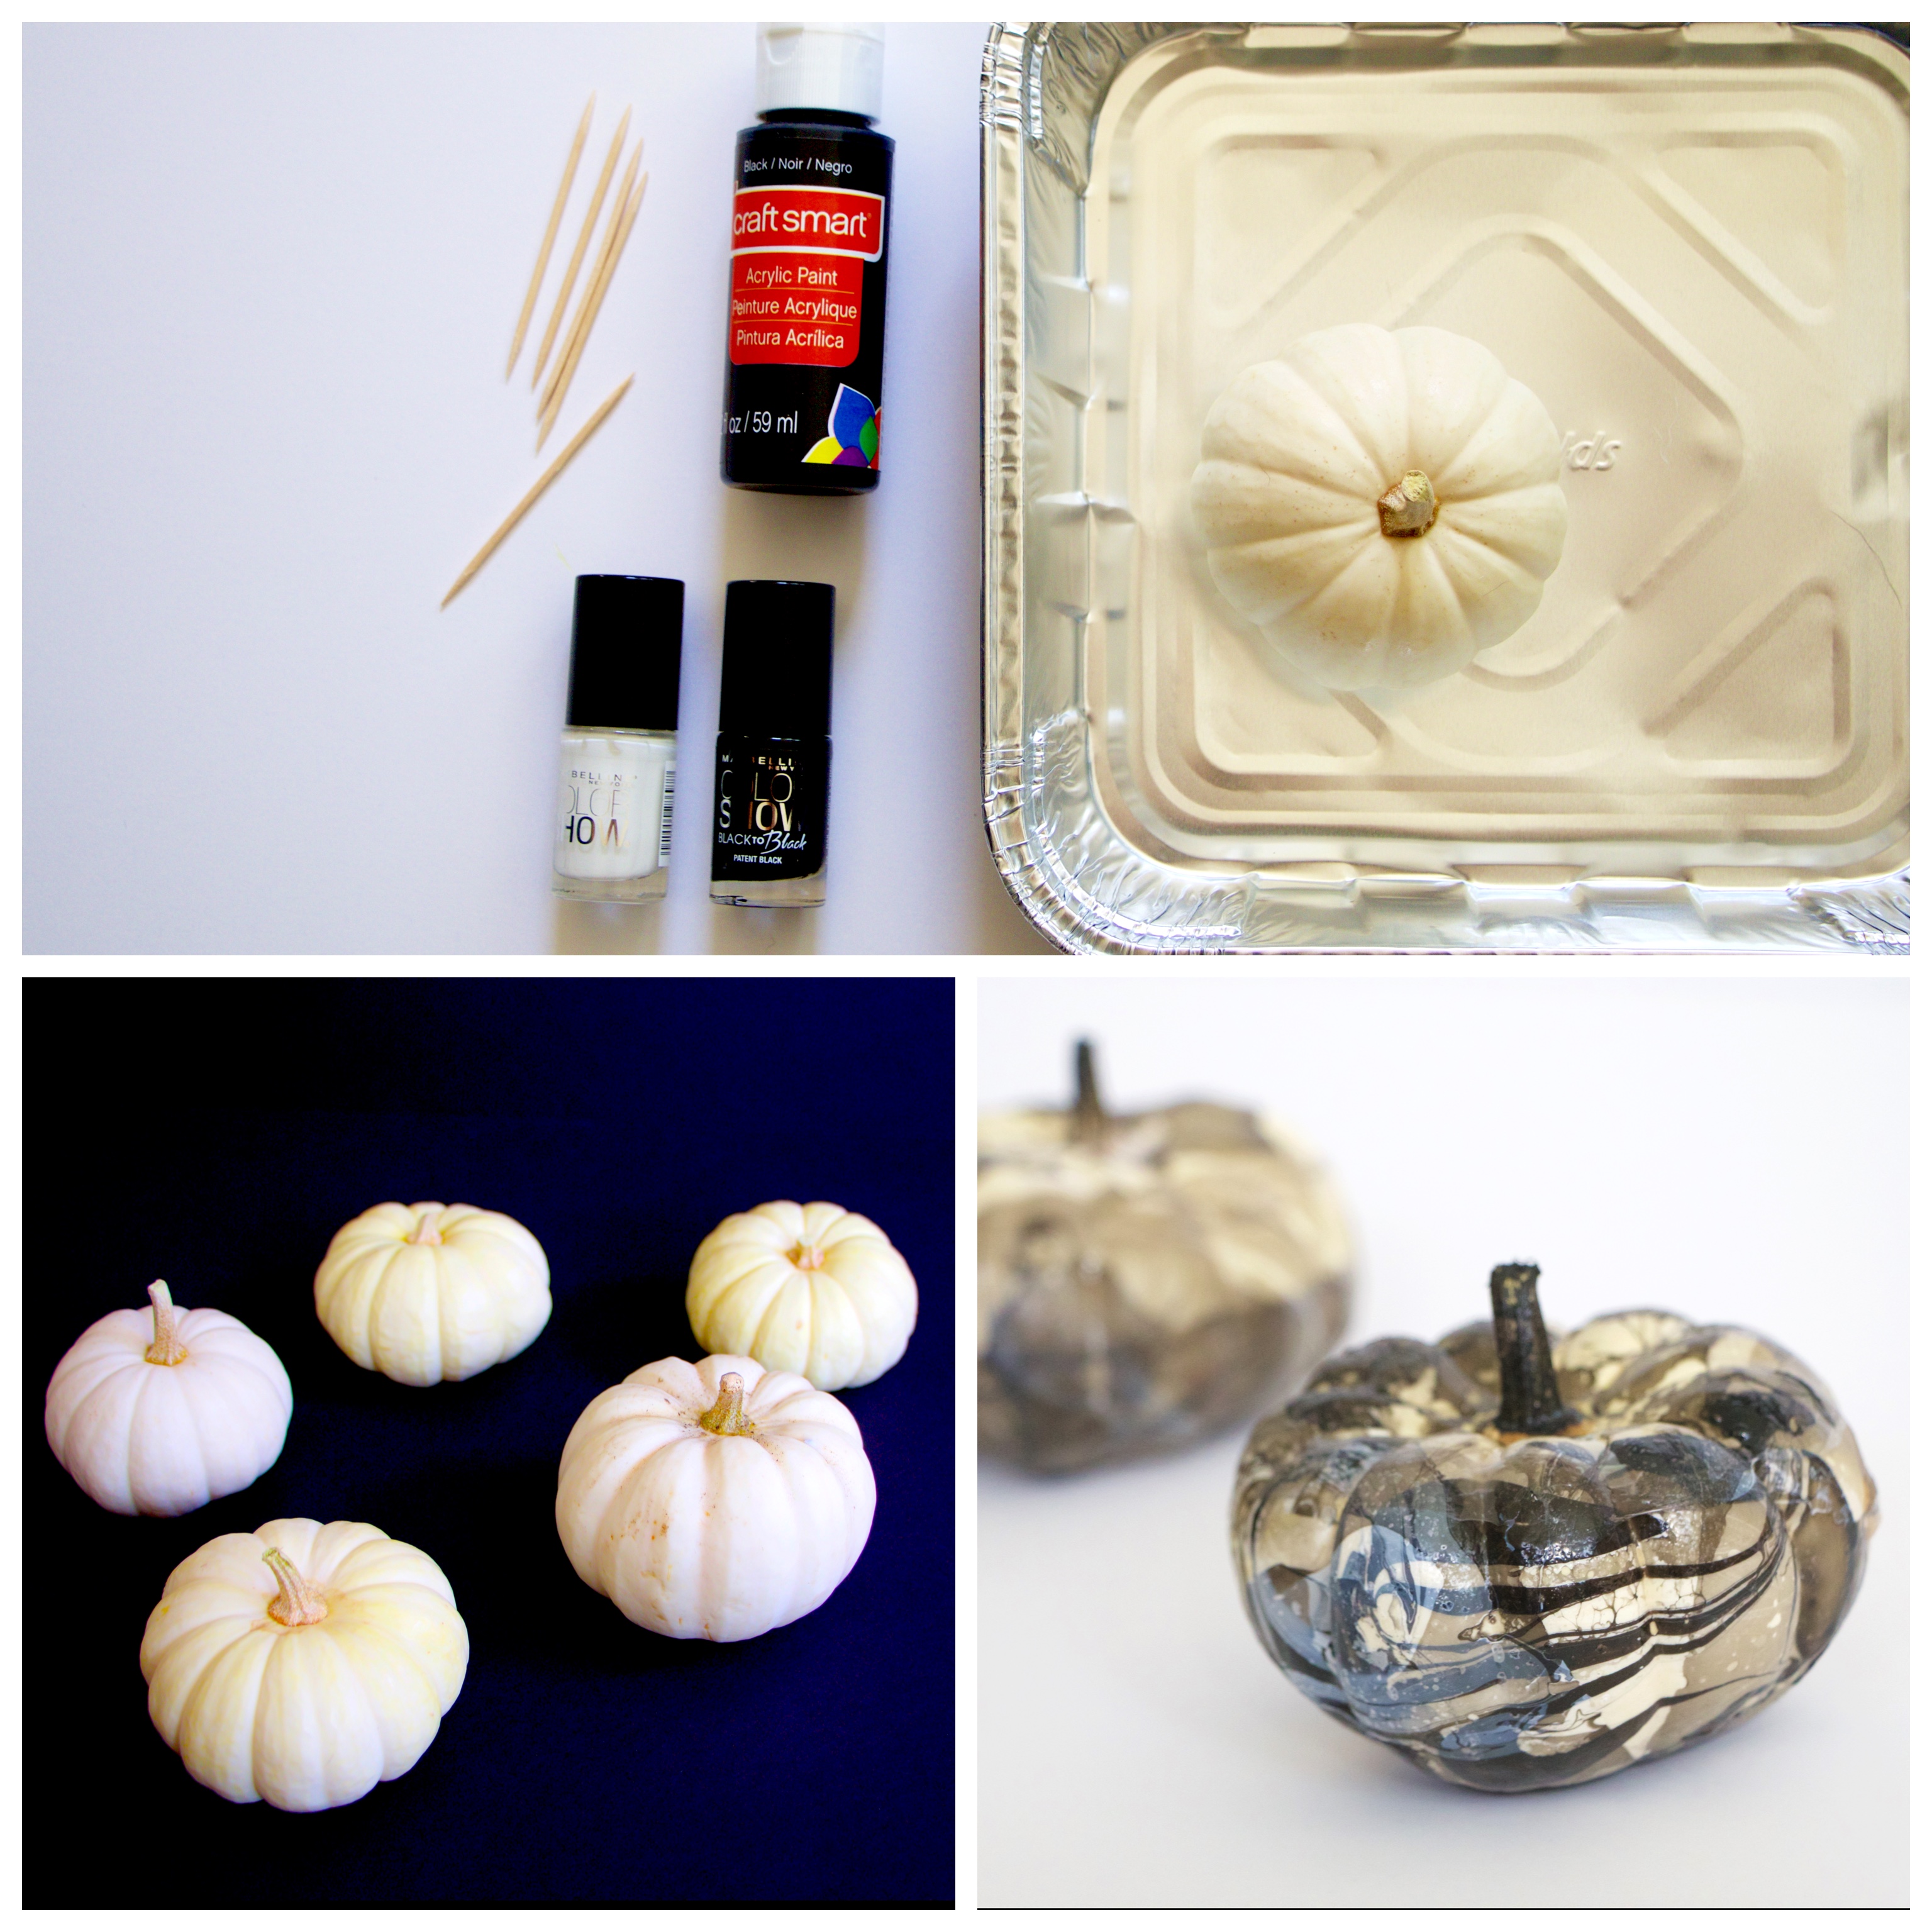
Marbled Pumpkin:
Pumpkin
Nail polish
Bowl – I recommend using a bowl that can be thrown out after.
Lukewarm water
Toothpick or bamboo skewer
Directions:
Fill the bowl with luke-warm water. Moving quickly, drop in several drops of both nail polish switching between colors (use any color)! Take a toothpick and draw swirl marks through the drops to create a design. With your pumpkin ready, dip the pumpkin into the design. Repeat as necessary. I choose to paint the stems black after. The best part is that you can use any color nail polish and these are generally already on hand (see what I did there?) I recommend using new(er) polishes for best results.
Spray Painted Pumpkins
I love how quick this DIY is, the options are endless – try using a white pumpkin with black or gold spray paint!
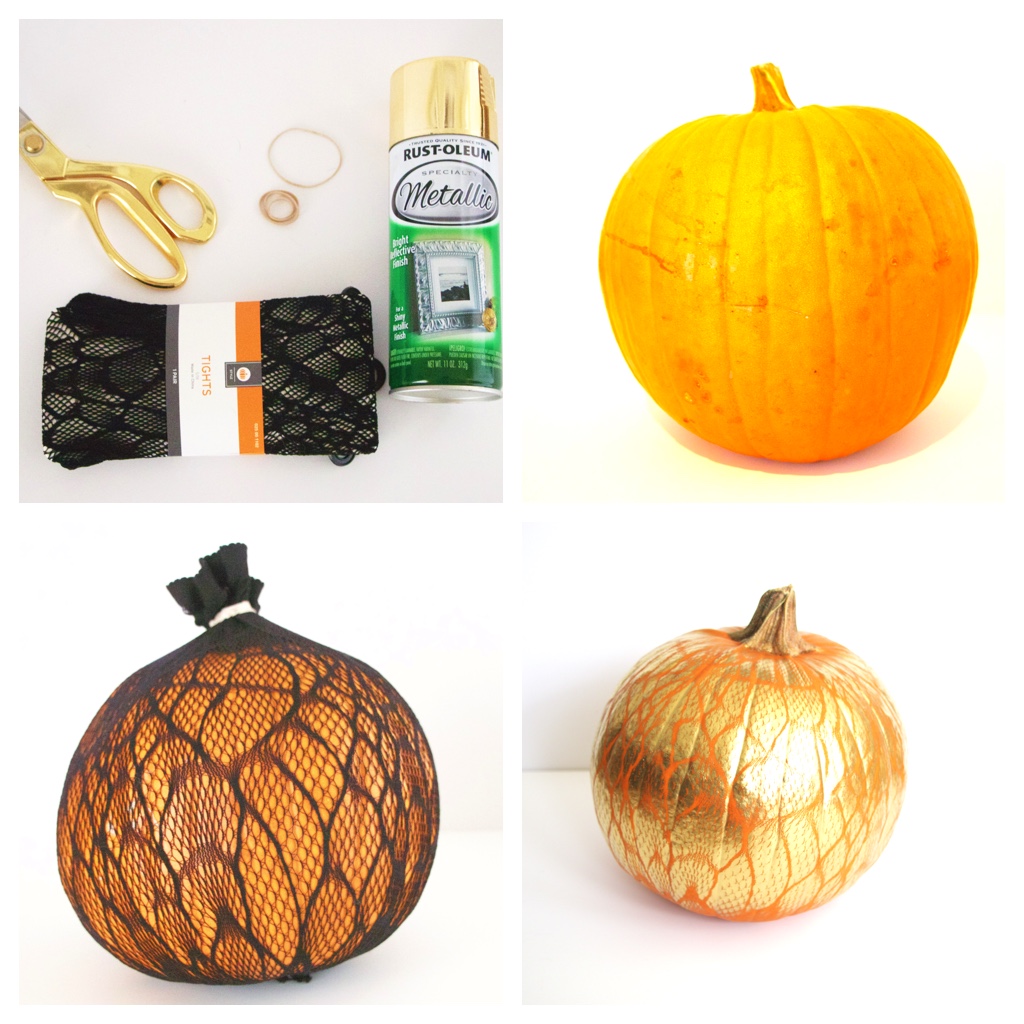
Spray Painted Patterns:
Pumpkin
Patterned tights
Spray Paint
Rubber bands
Directions:
Depending on the size of your pumpkin, you can use the legs or the waist of the tights (for larger pumpkins). Snip the tights to create a sleeve for the pumpkin to be placed into. Secure both ends with rubber bands. If you want to keep the stem its natural color, use painters tape over the band and stem to protect it from the spray paint. Shake the spray paint can and spray while rotating the pumpkin. I recommend spray painting in a well-ventilated space, outside is ideal. My boyfriend also recommends this, as he had to deal with the vapors after I attempted to spray paint inside. Oops. Remove the sleeve you created once the paint is dry!
Decoupage Pumpkins
While I used an old calendar for this one, you could use any scraps you have laying around, wrapping paper, cards, etc.
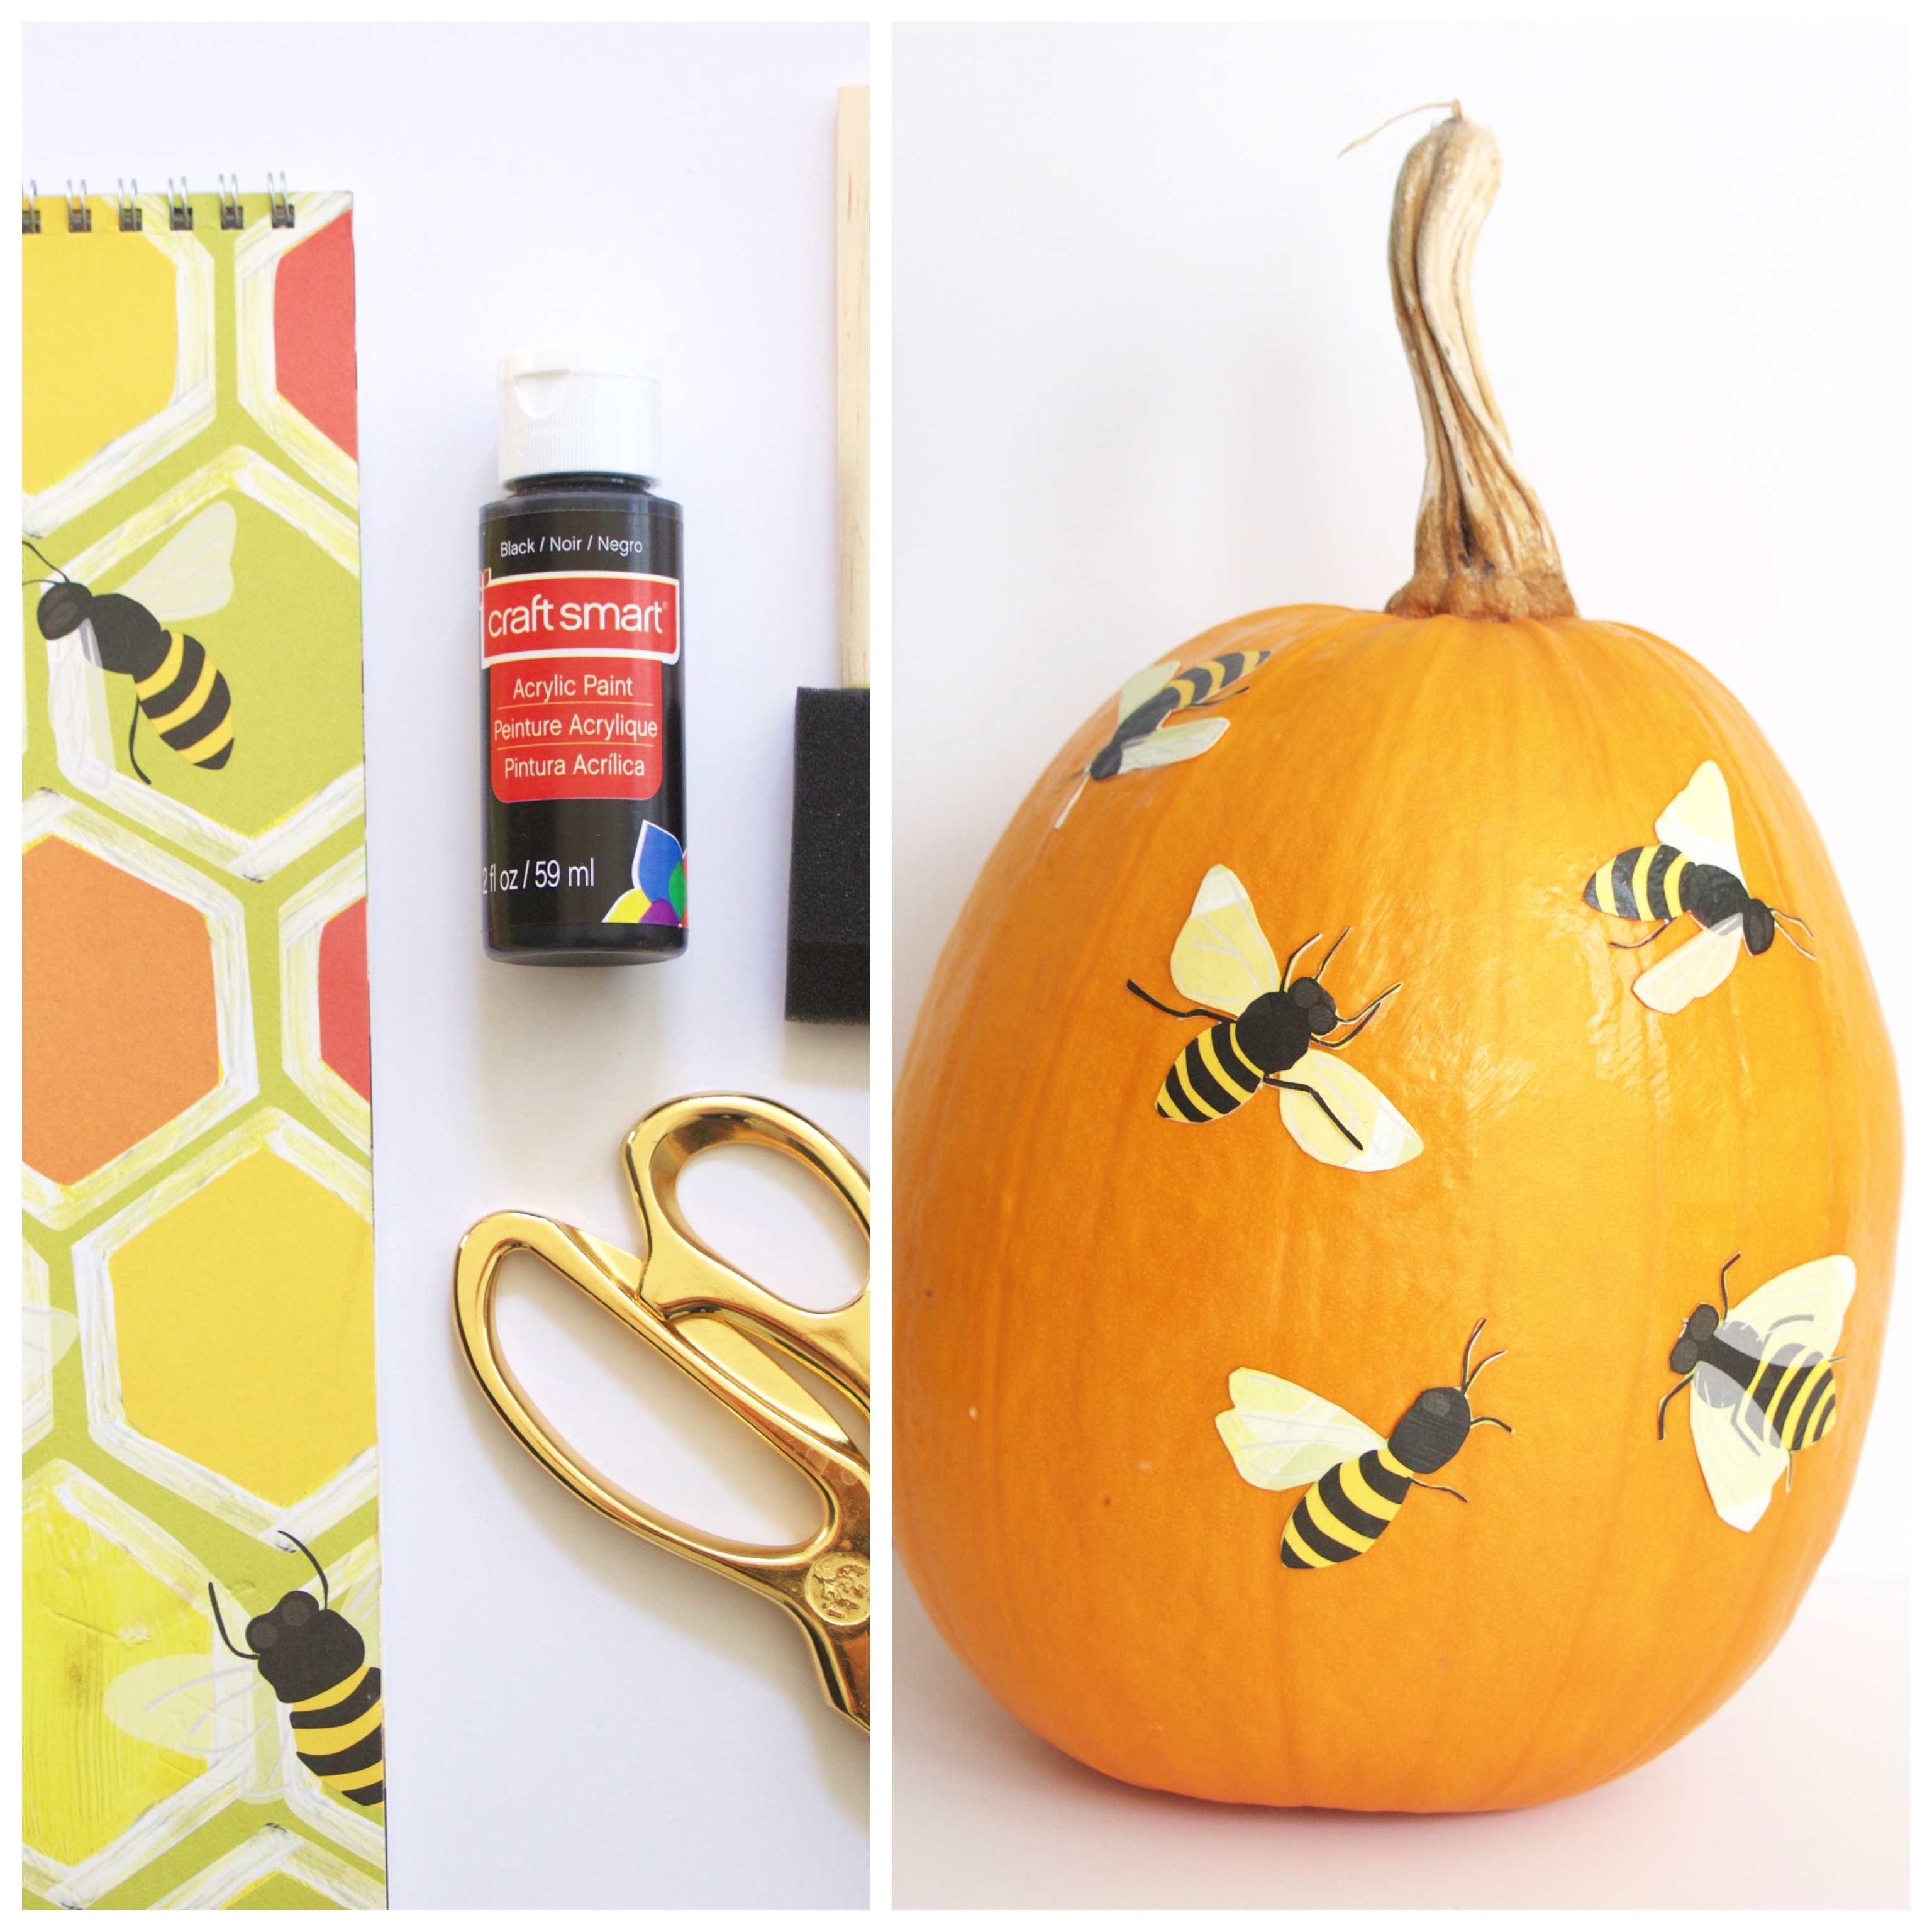
Decoupage Pumpkin:
Pumpkin
Print of choice – wrapping paper, leaves, the options are endless!
Sponge brush
Mod Podge
Paint – if you choose to paint your stem
Directions:
I had some Rifle Paper Co. calendars from past years – just in case a DIY project came about! I went through the pages and selected the little bees and simply cut them out. I applied Mod Podge to the pumpkin where I wanted to adhere my cut-out images. After I placed an image onto the pumpkin, I applied more of the Mod Podge on the top and any corners that started to stick up.
I hope you enjoy your manicured pumpkins in your home this season!